Manage Billing Agreements
Billing Agreements allow authorized thirdparty Vendors to collect fees directly from their clients, saving your team time and making vendor invoicing easy.
Billing Agreements can be assigned to multiple pages, or multiple Billing Agreements can be created and assigned to specific pages.
User Access Requirements
Super Admin access or a Custom Permission Set is required to set up a Billing Agreement on a fundraising account. Users without Billing Agreement permissions are unable to create or edit Billing Agreements.
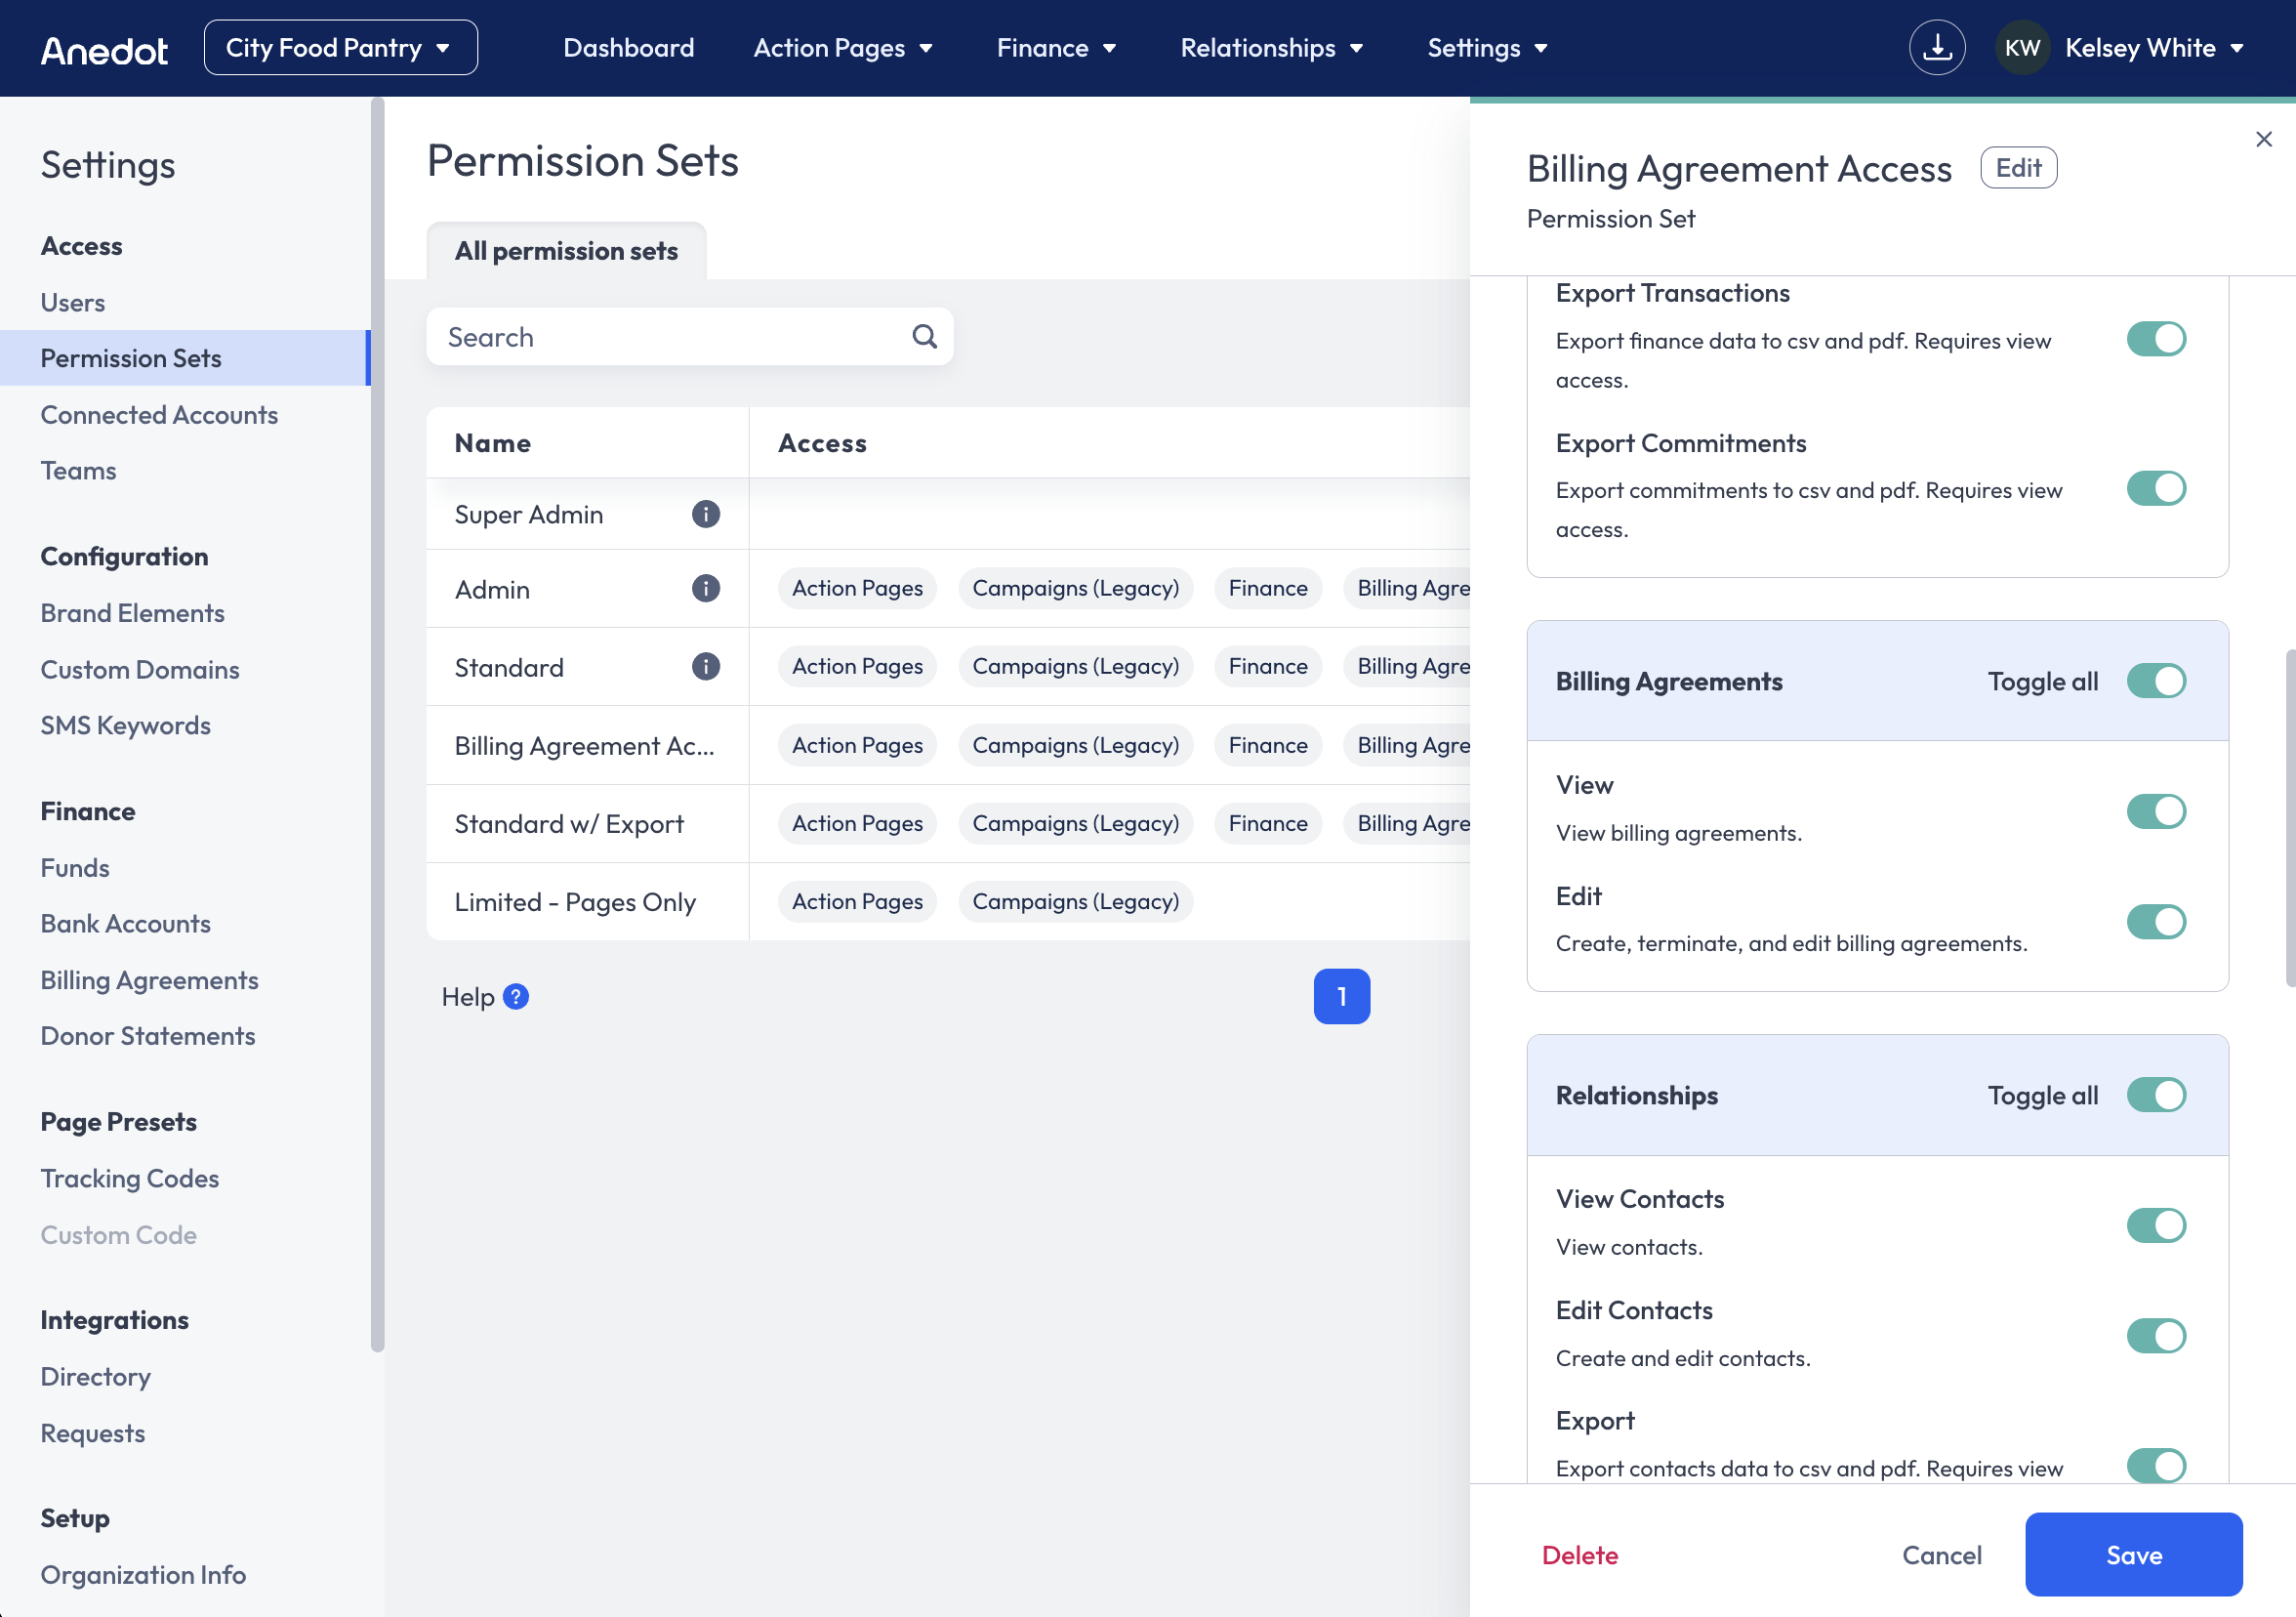
When creating a Custom Permission Set to allow for Billing Agreement management, the Permission Set will need to include the following access at a minimum:
- Action Pages: View, Edit
- Billing Agreements: View, Edit
Check out the following guides for further instructions on how to update a user's access and create Custom Permission Sets:
Super Admin access provides FULL account access to a user. The user will be able to manage, export, edit, refund, and pause an account. They may also request an Ownership update and an account closure with our Support team. Discretion should be used when assigning Super Admin access.
If a Super Admin should be removed from an account, please contact our Support team here.
Request User Access
To request access to create and manage Billing Agreements, please contact the Owner of the fundraising account or another Super Admin user. The appropriate access can be assigned within the Settings> Access>Users tab.
Alternatively, the Owner of the fundraising account can contact our Support team directly to request the permissions update. In the request, please specify the requested permission updates (Super Admin or Custom Permission Set).
Create Billing Agreements
To Create a Billing Agreement, follow the steps below:
- Access the Settings>Finance>Billing Agreements tab within your fundraising account.
- Click the blue New Billing Agreement button in the upper right corner.
- Complete the following fields:
- Name: Add a custom name for your Billing Agreement
- Connected Account (Vendor): Select Account not listed? Connect new account from the dropdown list. A new field will become available to enter the Vendor Account UID.
- The Account UID can be found in the URL when logged in.
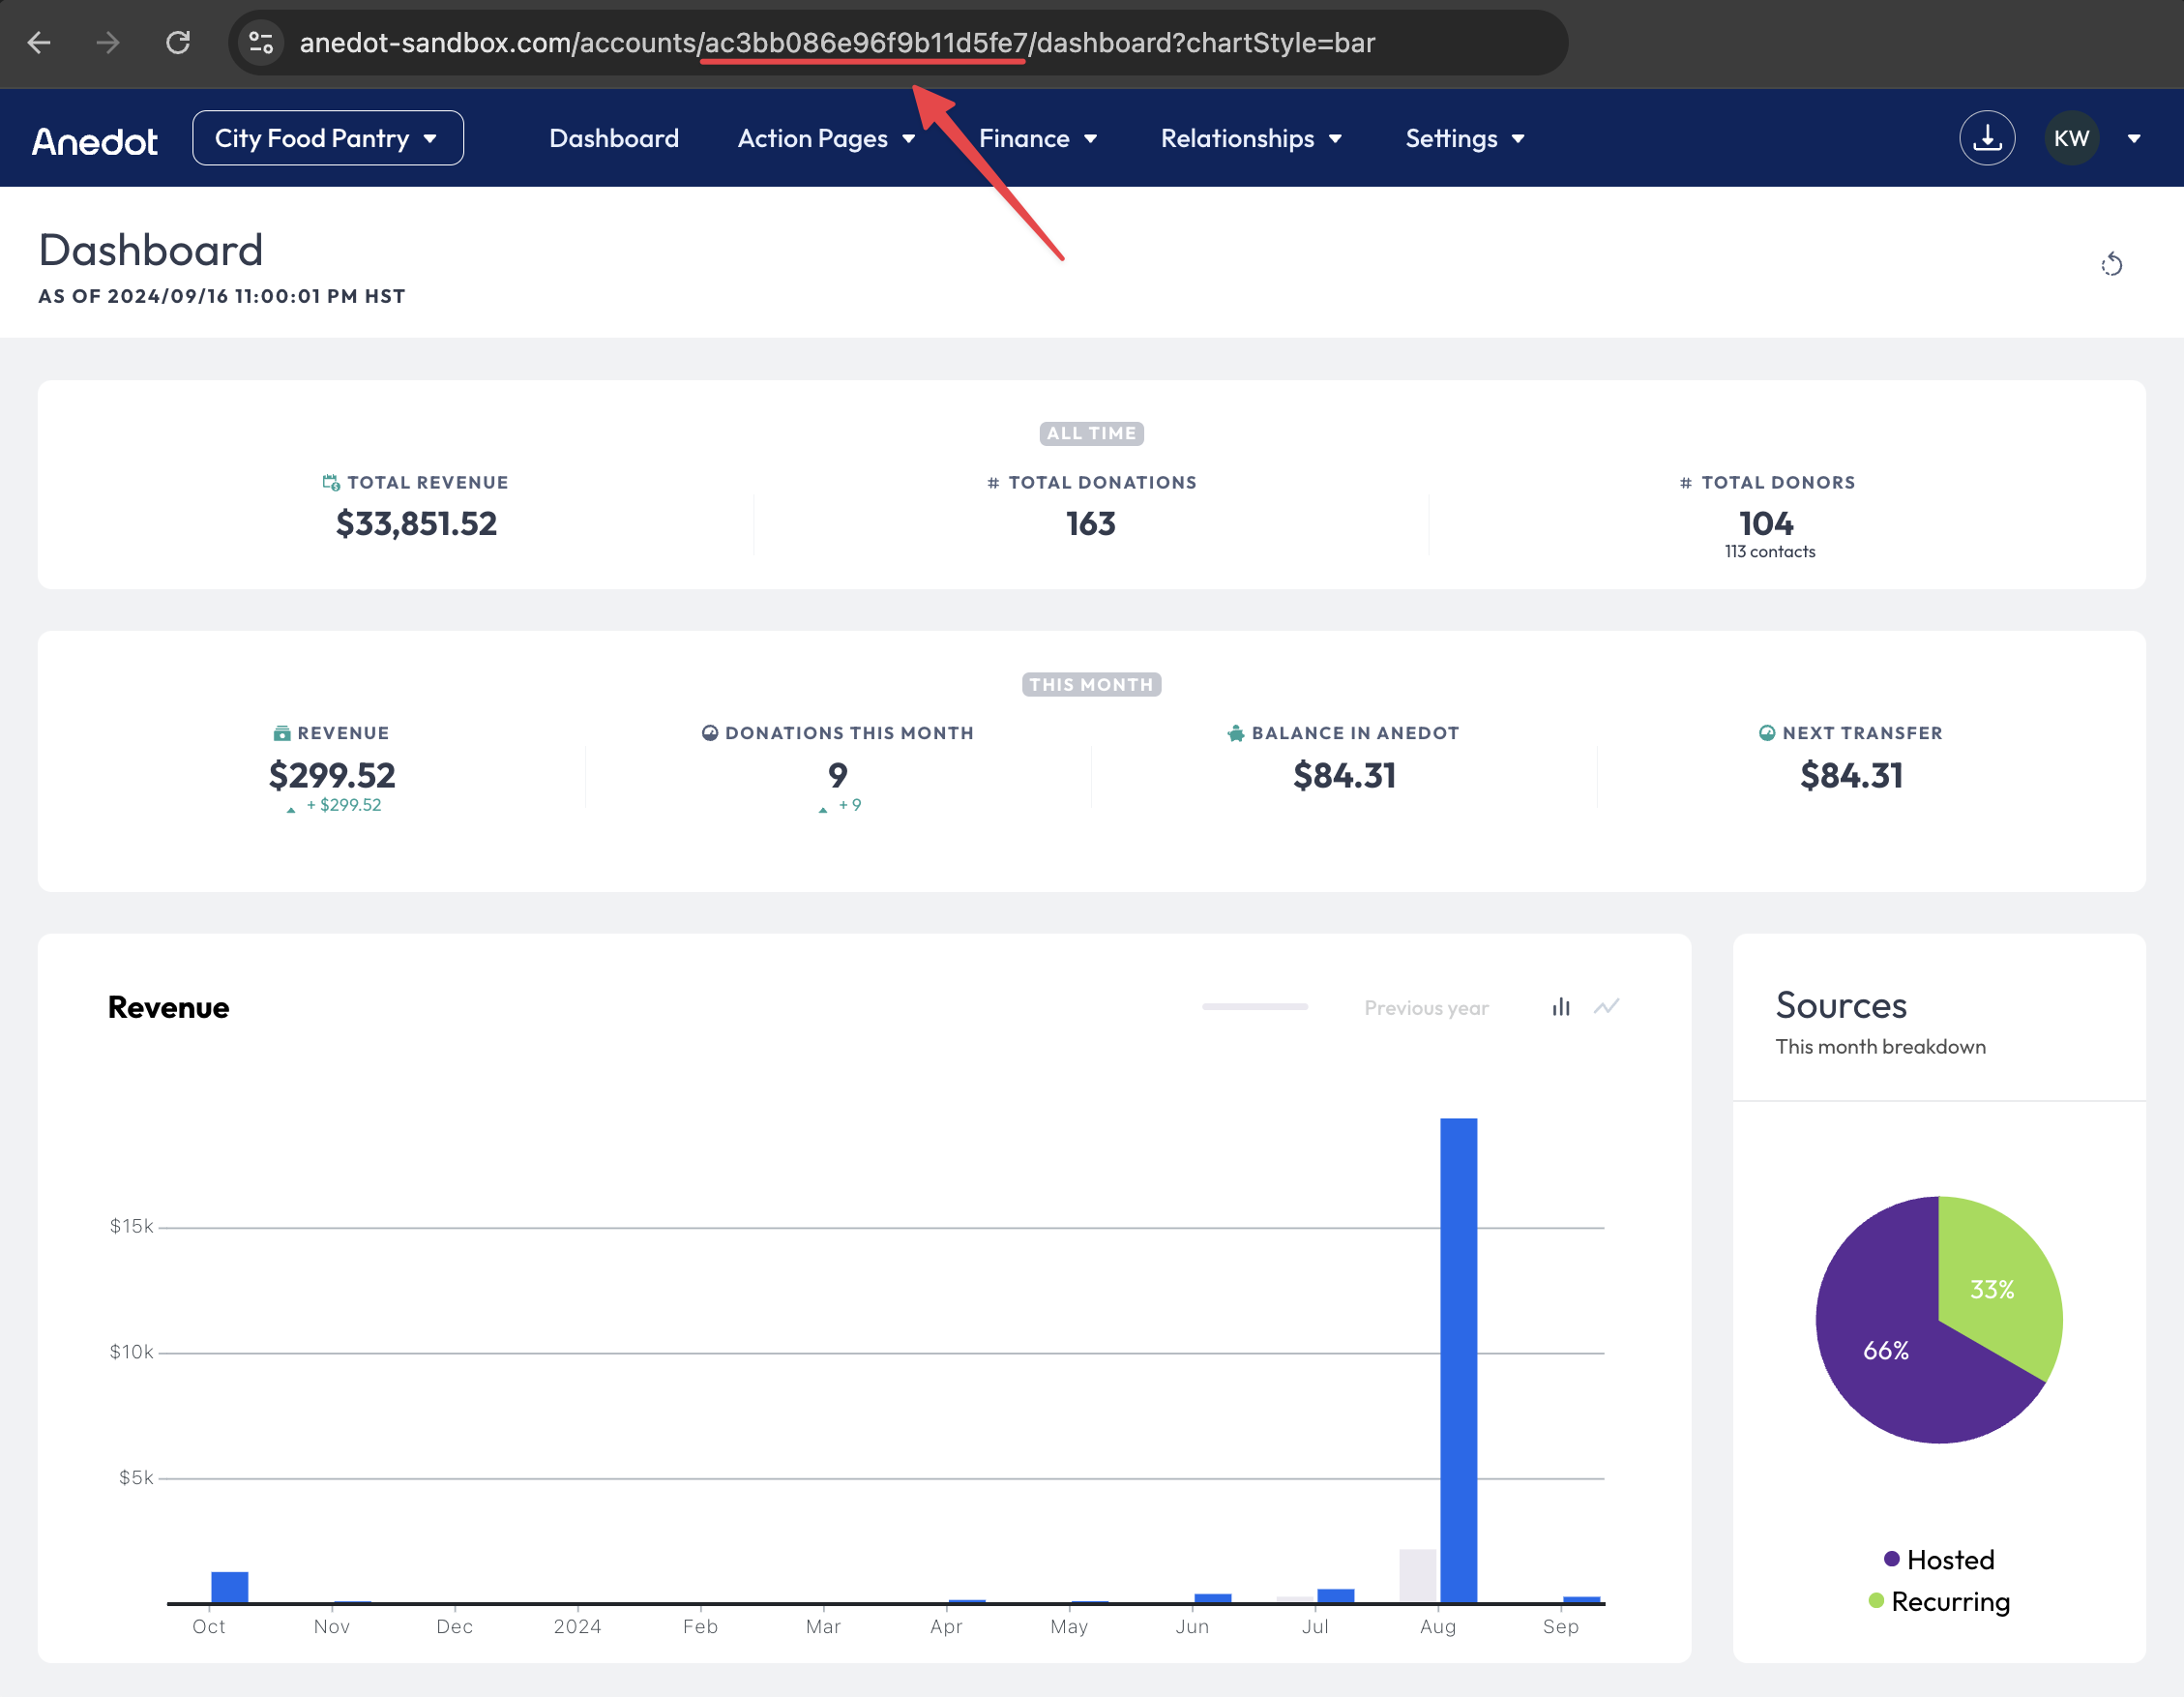
- The Account UID can be found in the URL when logged in.
- Markup Commission: This is the percentage you pay the vendor on an individual page or the whole account.
- Billing Agreements may be added up to 95% of the donation.
- Terms: You may choose whether the markup should be refunded or not and whether the markup should be included on subsequent recurring transactions.
- Add Contract Terms: You may add additional terms to the Billing Agreement to reflect any language in your contract with a Vendor.
- Associated Action Pages: Billing Agreements may be added to multiple Action Pages.
- New Agreement: Click the blue New Agreement button to apply your Billing Agreement.
Adding a Billing Agreement to your account will automatically approve the agreement. The commission rate will be applied to the individual transactions the Billing Agreement has been assigned to.*
View and Edit Billing Agreements
To View the details of a Billing Agreement, follow the steps below:
- Access the Settings>Finance>Billing Agreements tab within the fundraising account.
- Hover over the Name of the Billing Agreement.
- Click View.
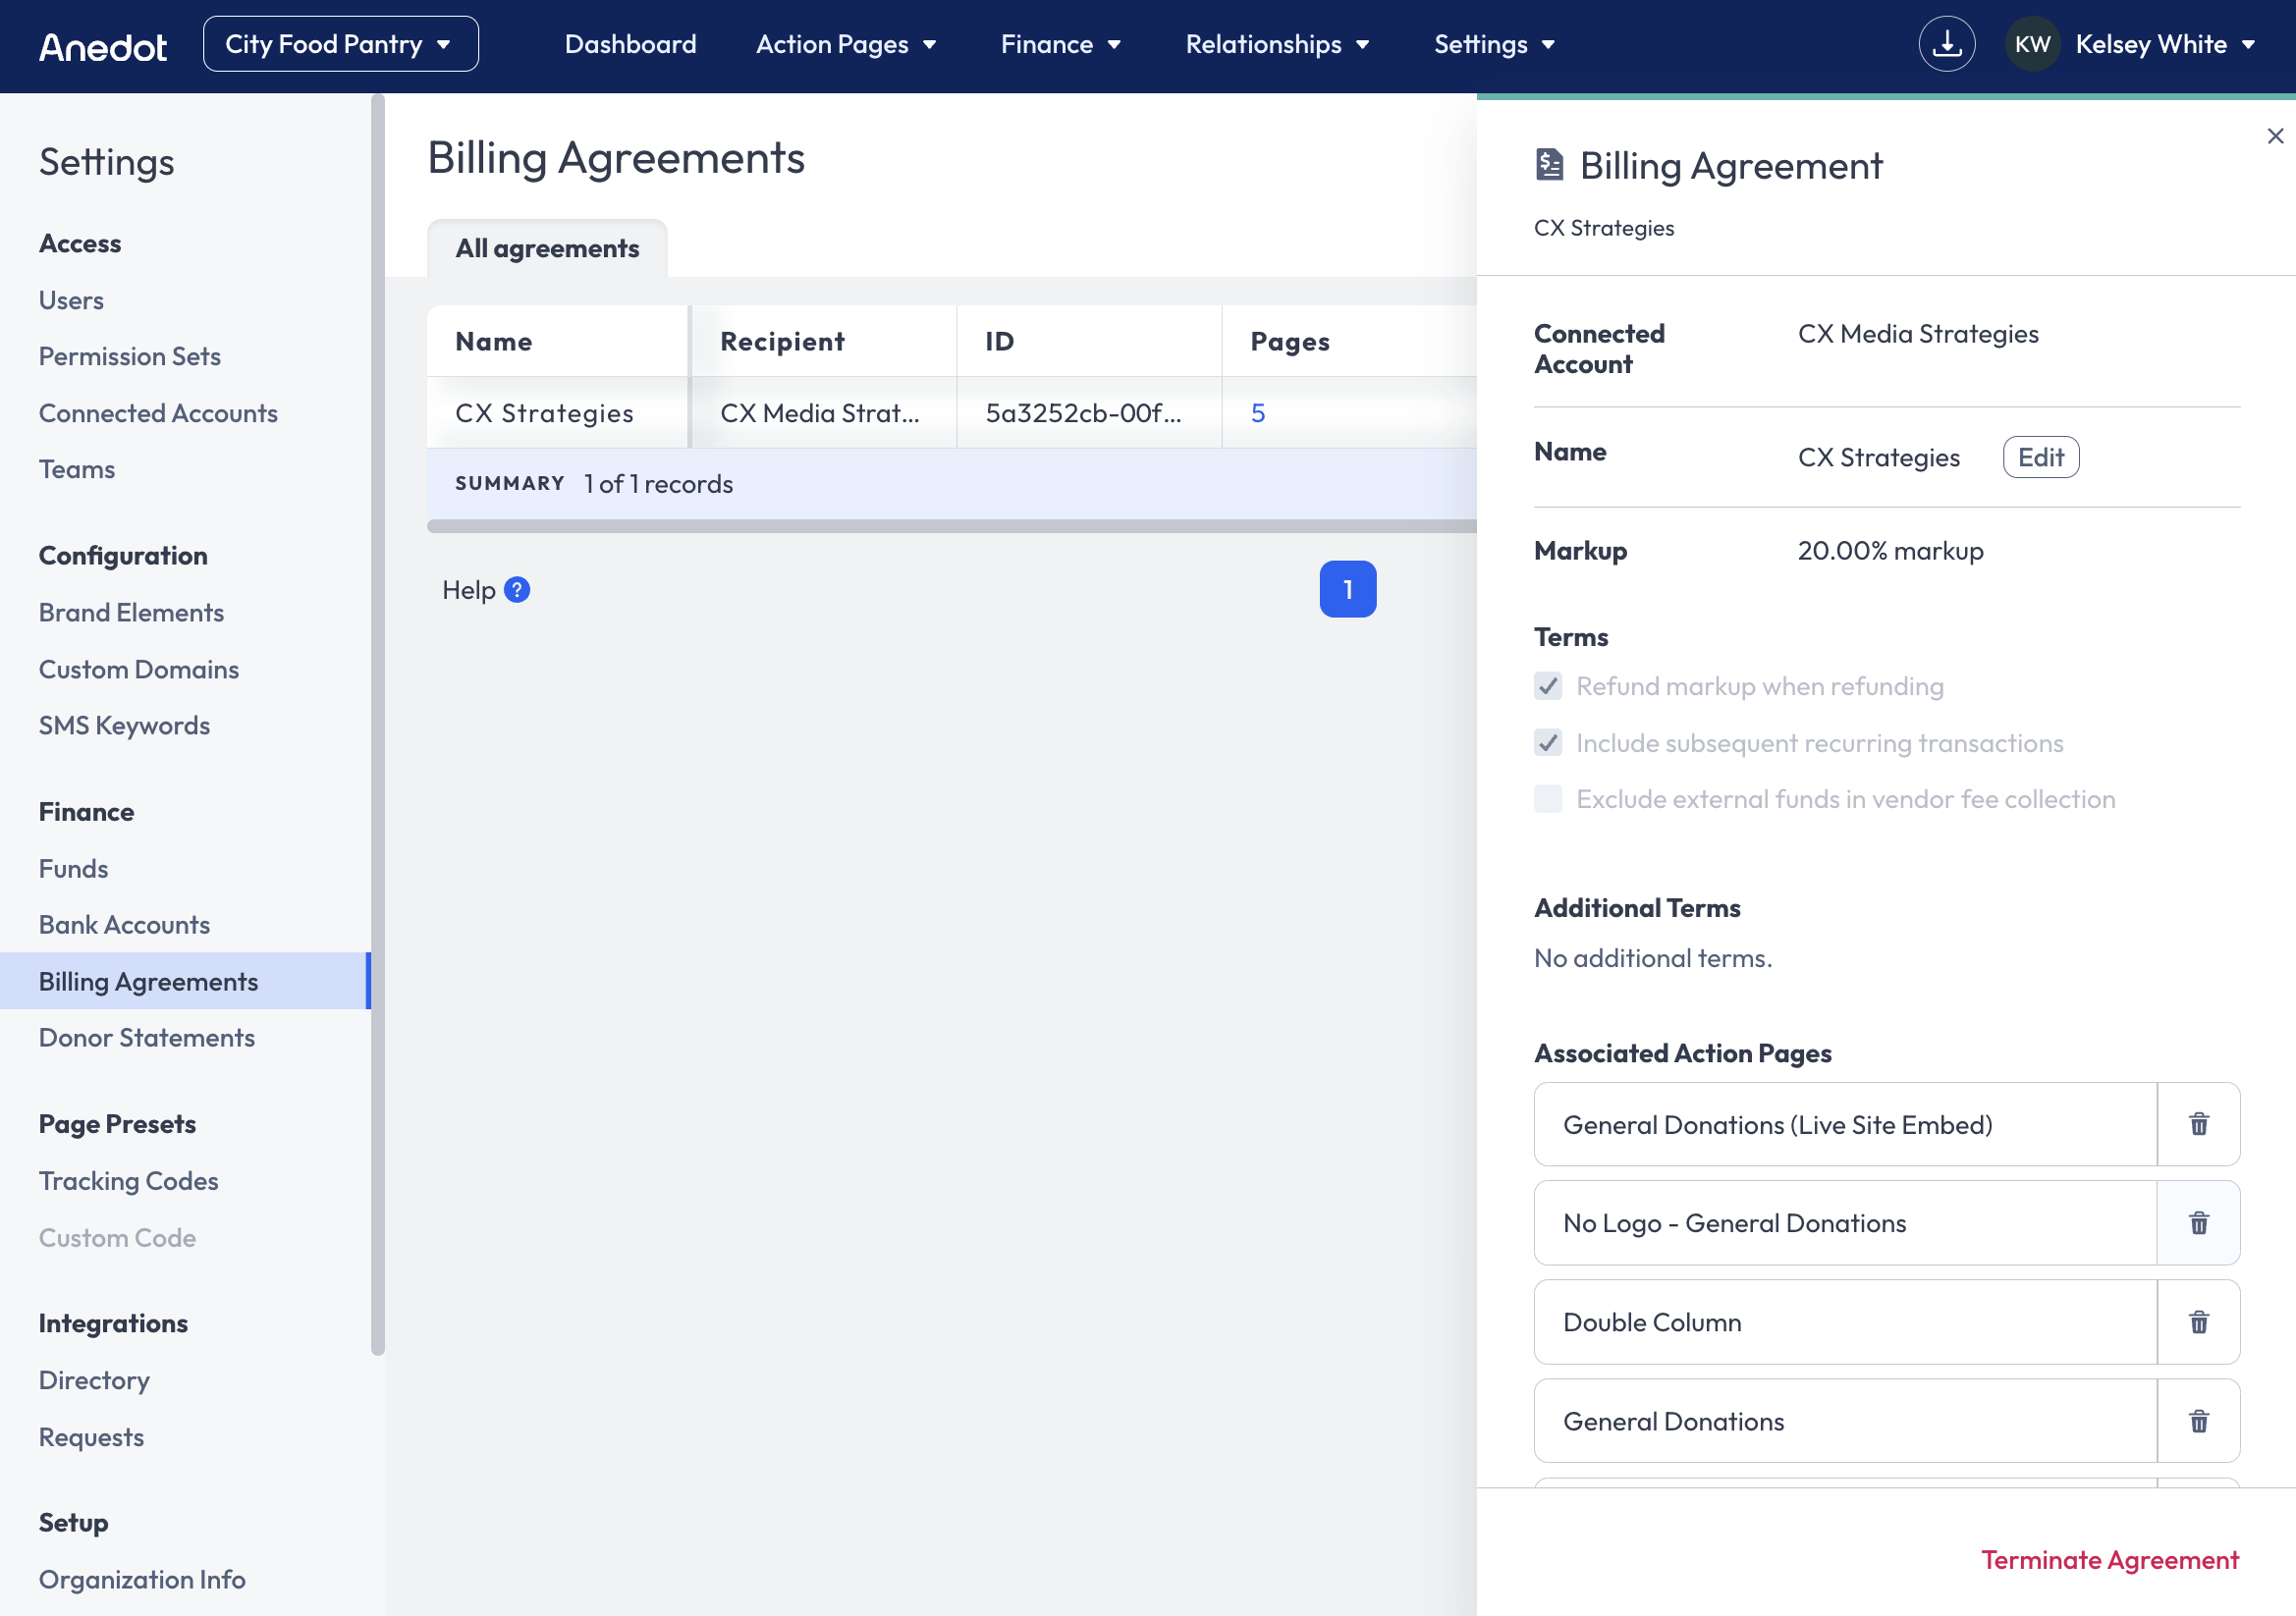
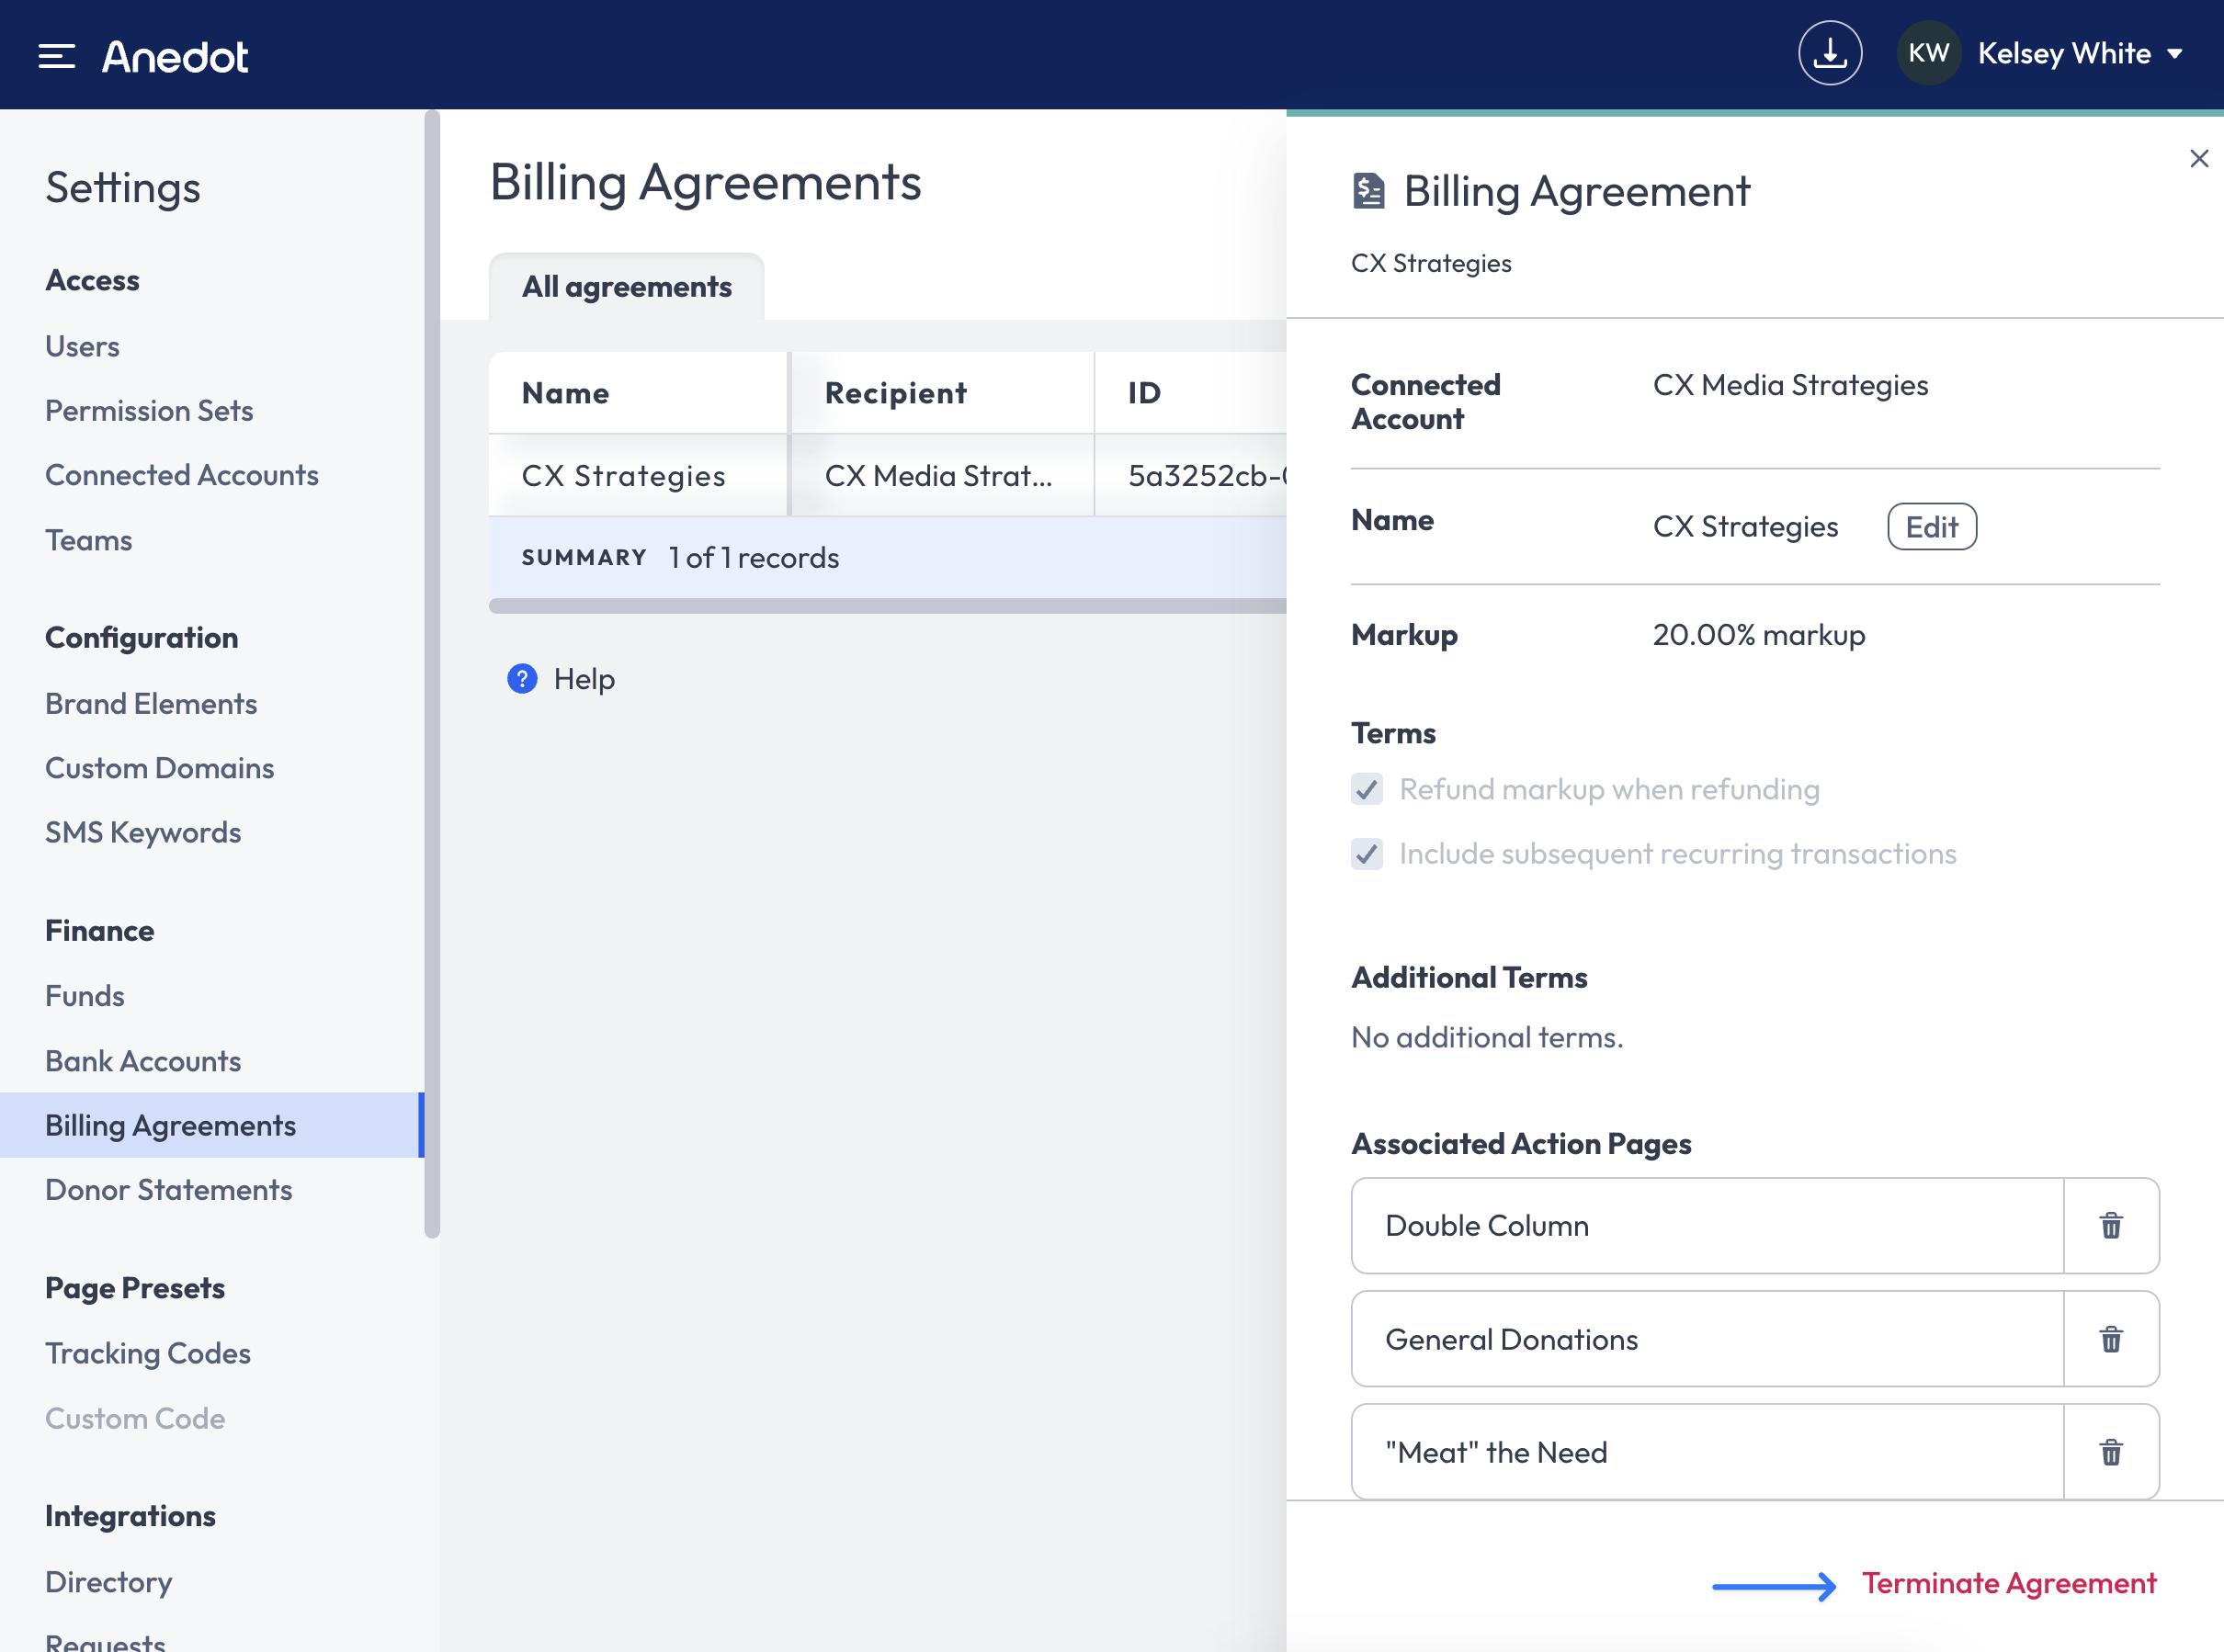
Within the View Billing Agreements drawer, the following Edits can be made:
- Name
- Associated Action Pages (Add or remove pages)
- Terminate Agreement
Once a Billing Agreement has been created, the Terms and Markup rates cannot be adjusted. If changes to the Terms or Markup are required, we recommend creating a new Billing Agreement and terminating the old agreement.
Changes made within the Billing Agreement drawer go into effect in real time. Once an Action Page has been assigned to the Billing Agreement, new donations processed through the Page will have the Markup applied.
Clone Actions Pages with Billing Agreements
When a Billing Agreement has been applied to an Action Page, cloning the page will carry over the Billing Agreement to the new cloned copy.
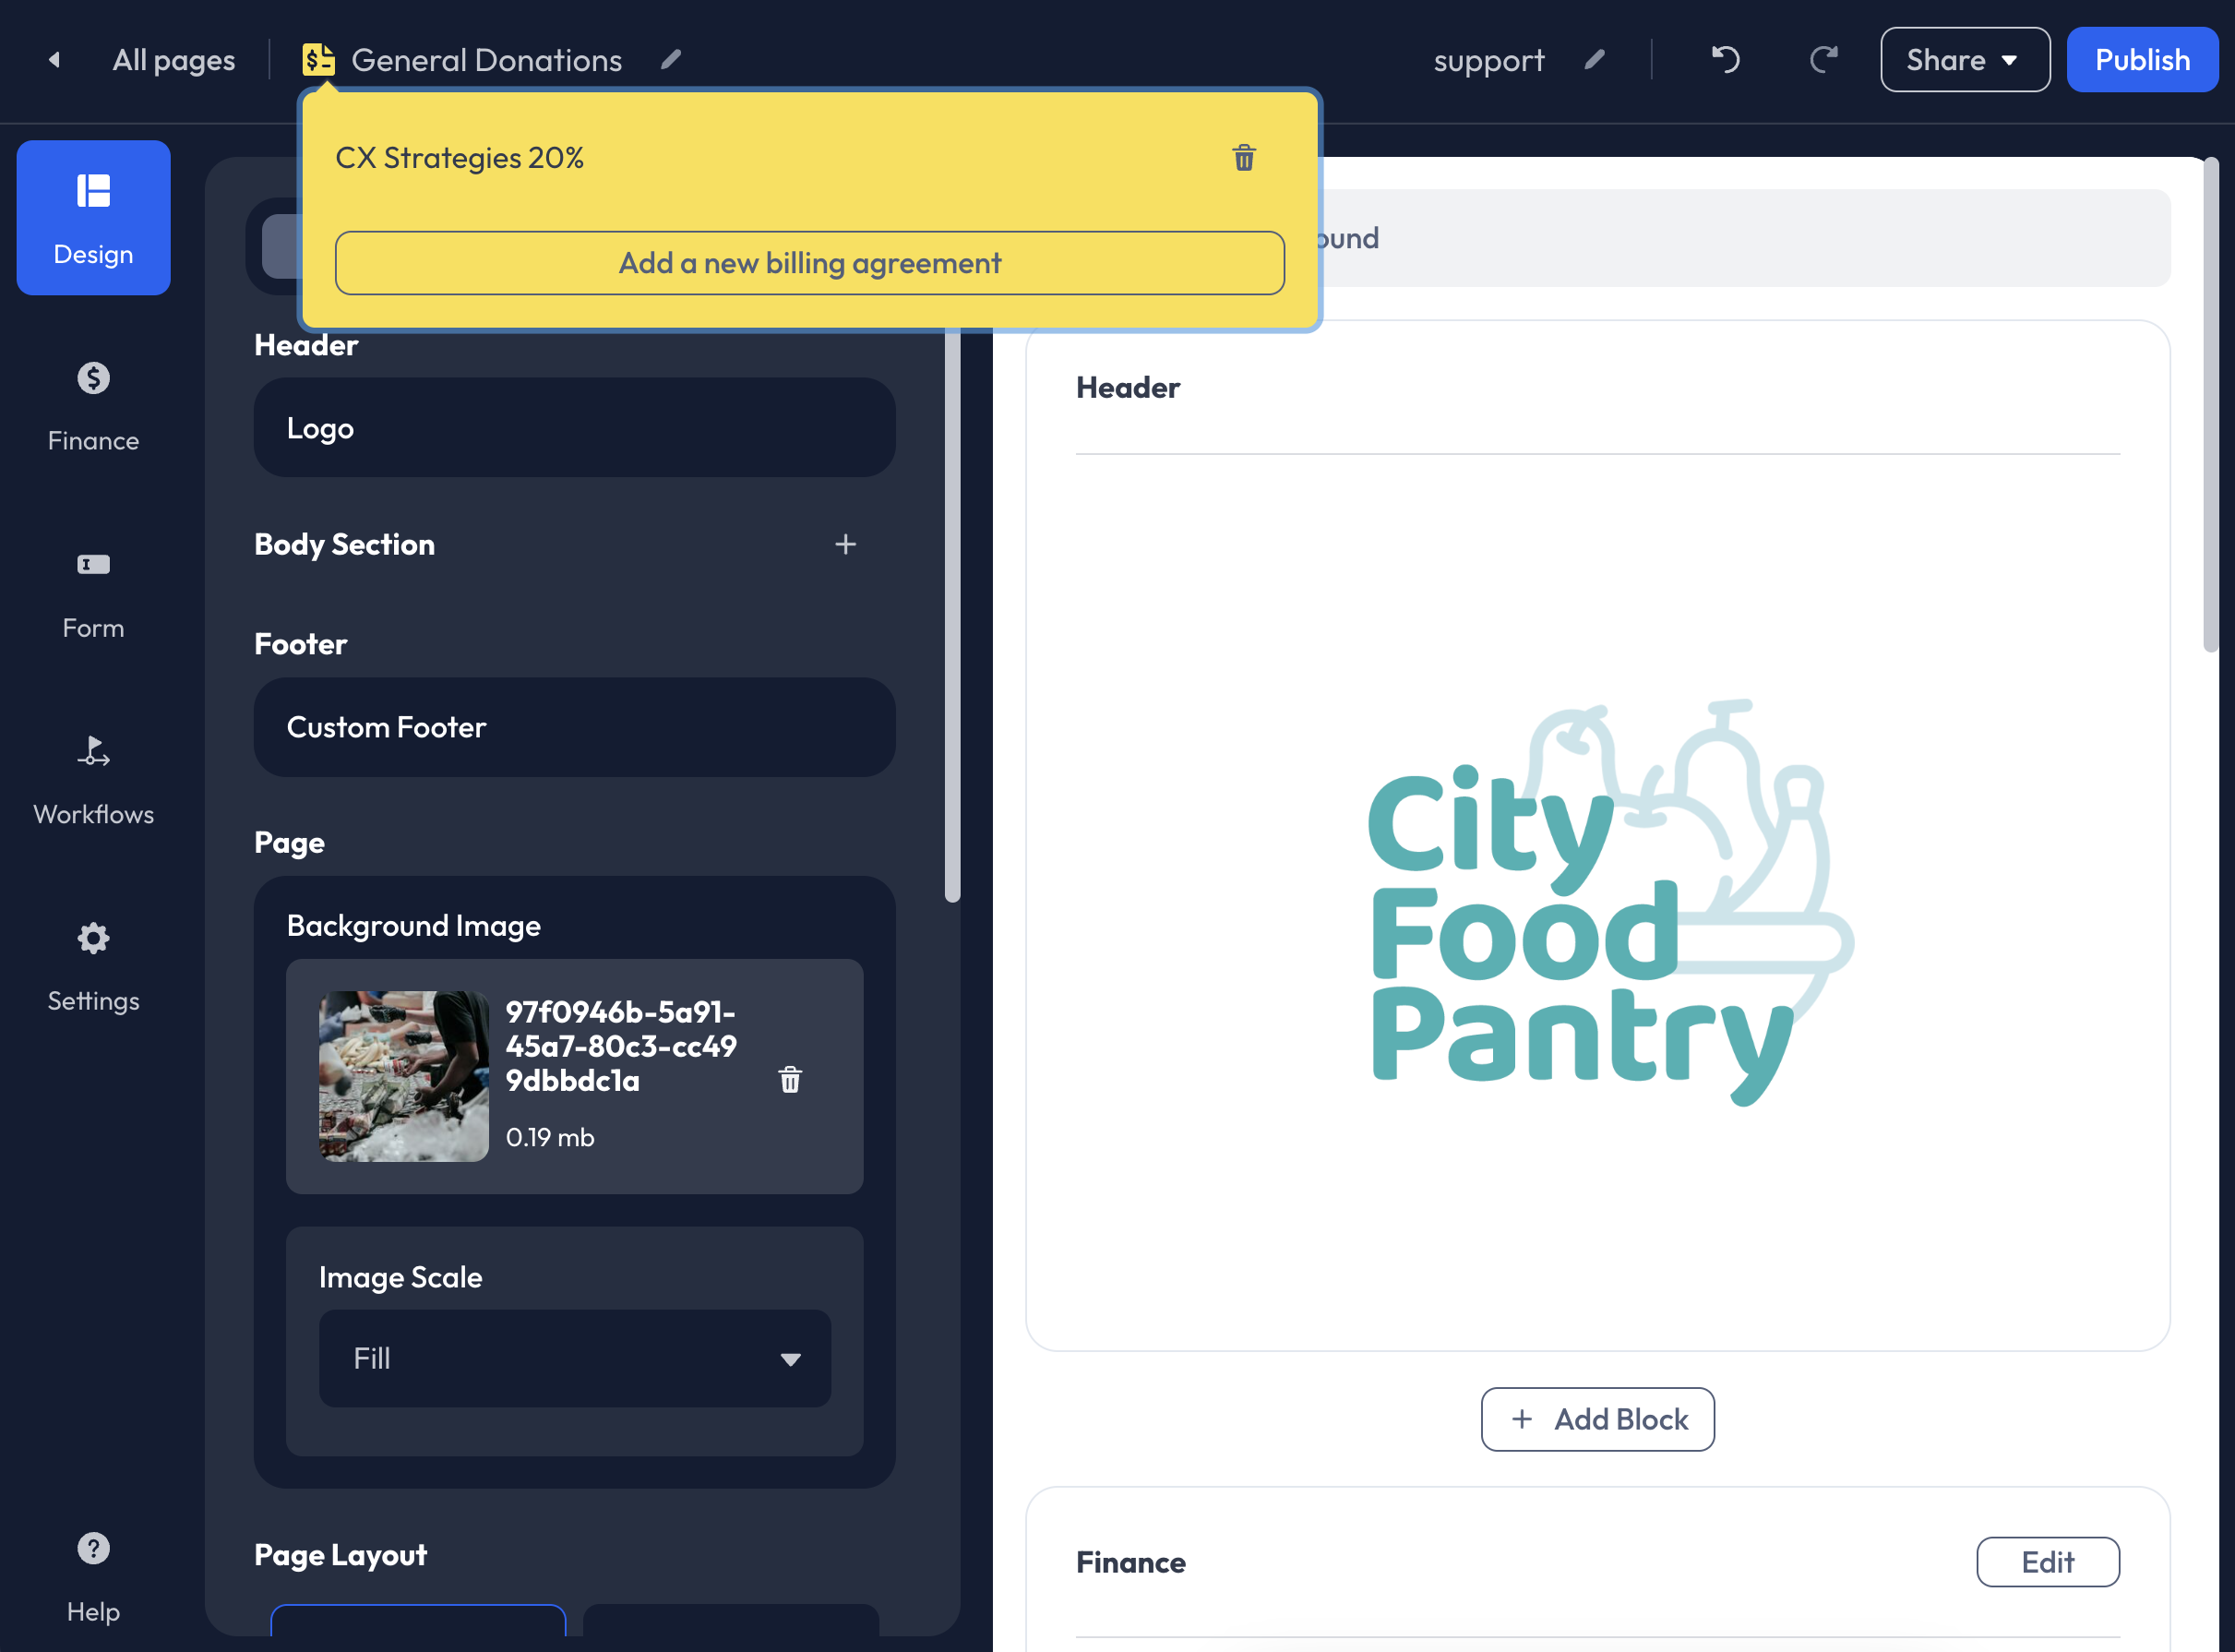
Users should take precautions when cloning Action Pages. Before cloning an Action Page, we recommend accessing the Action Page Builder. Within the Builder, you will find a Billing Agreement icon next to the Page Name. If a Billing Agreement has been applied to the page, the icon will be yellow. To review the Billing Agreement attached, click on the yellow Billing Agreement icon.
Users who have been assigned a custom Permission Set that does not include View Billing Agreements permissions will be unable to clone Action Pages.
Terminate Billing Agreements
To Terminate or cancel a Billing Agreement, follow the steps below:
- Access the Settings>Finance>Billing Agreements tab within your account.
- Hover over the Name of the Billing Agreement.
- Click View.
- Within the Billing Agreement drawer, click the red Terminate Agreement button in the lower right corner.