Teams
Teams are used to classify users for organizational, reporting, and access purposes. They differ from Permission Sets in that they allow you to limit a user's access to Pages and Page Data, while Permission Sets only limit a user's access to actions within an account.
Teams use Tags to determine which pages and data a user can access. One or more users can be assigned to a Team. Each Team will have a Default Tag that can be assigned to specific Pages. If the Default Tag is not assigned to Pages, users assigned to the Team will not have access to them.
When a user has been assigned to a Team, they will only receive email notifications for transactions processed through pages their Team Tag has been assigned.
Teams is currently only available for Anedot Pro accounts. If you would like to utilize the Teams feature for your account, please contact our Support team here.
When To Use Teams
When collaborating with consultants, vendors, or volunteers, it may be necessary to limit their access to your account data. By establishing a Team and assigning the user(s) to it, you can effectively control their access to specific data.
Users who require full access to an account should not be added to a Team. The Account Owner should NEVER be added to a Team.
Create a Team
To Create a Team, follow the steps below:
- Access the Settings>Access>Teams tab within your fundraising account
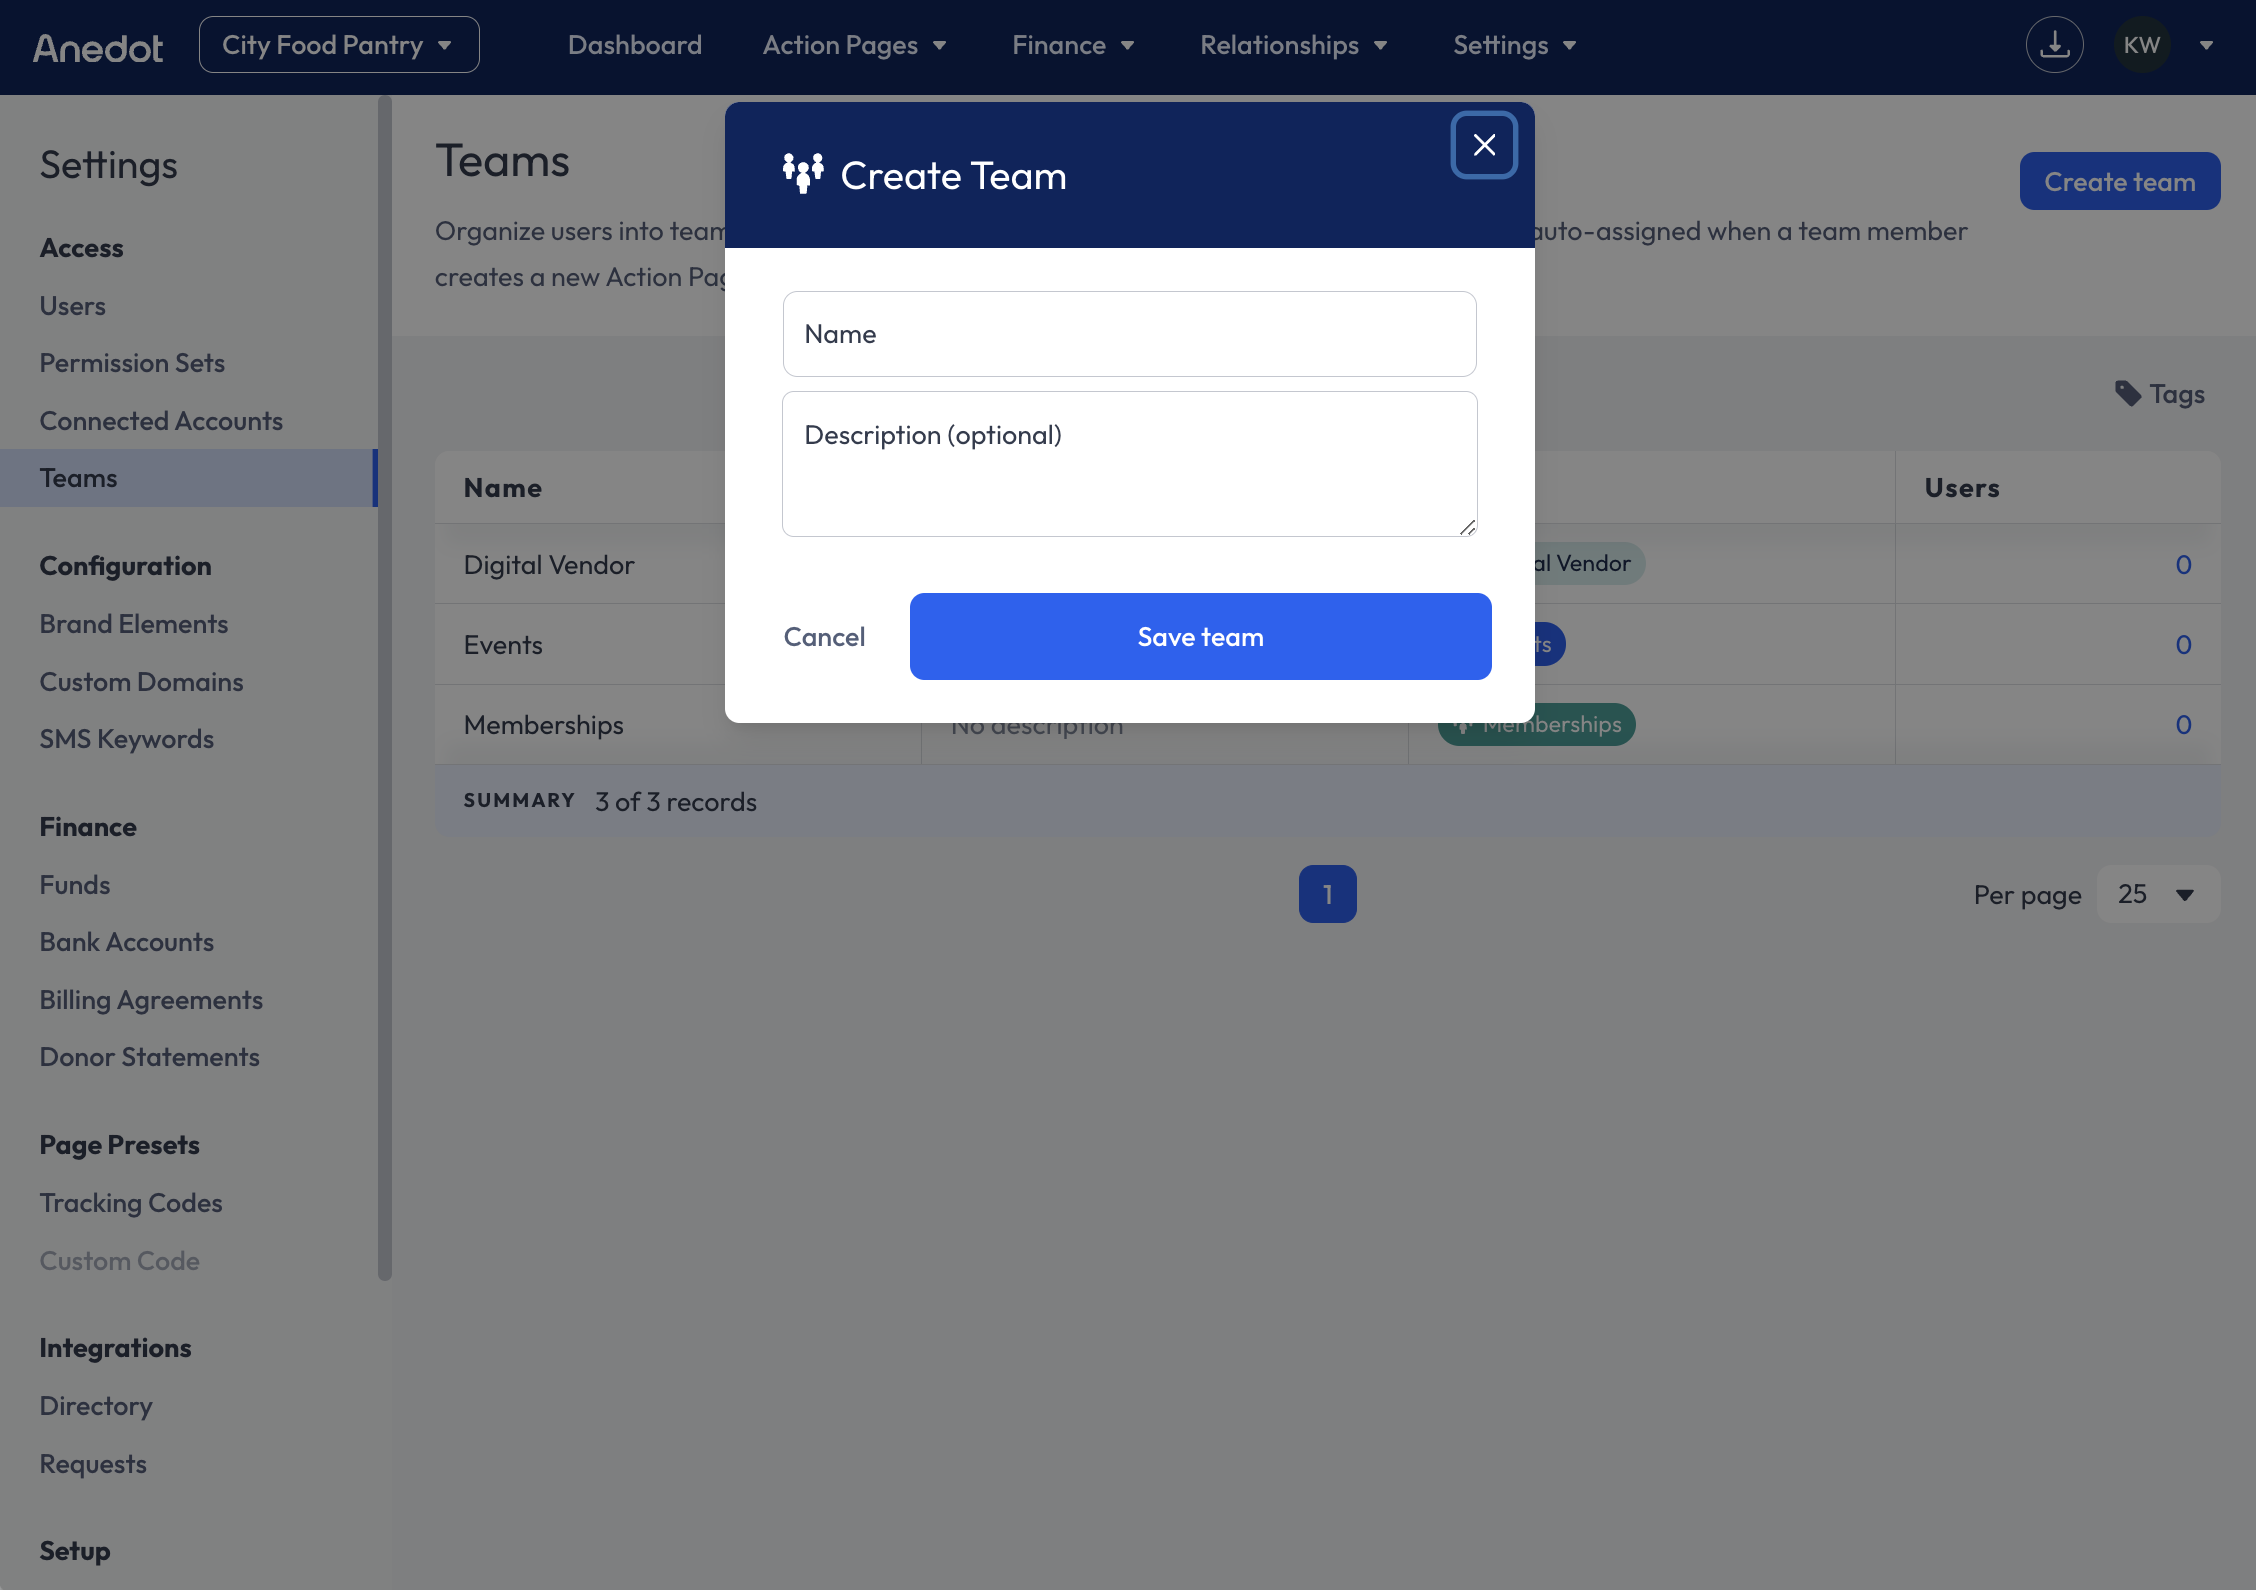
- Click the blue Create team button.
- Enter a Name (required) and Description (optional) for your Team.
- Click Save Team.
A Team Tag will then be created. This tag will be considered the Default Tag for members of the Team.
The Default Tag will automatically be applied to Action Pages that have been created or cloned by a member of the Team.
A Team Tag will then be created. This tag will be considered the Default Tag for members of the Team.
The Default Tag will automatically be applied to Action Pages that have been created or cloned by a member of the Team.
Assign Users to a Team
Once a Team has been created, users will need to be assigned to the Team. Follow the steps below:
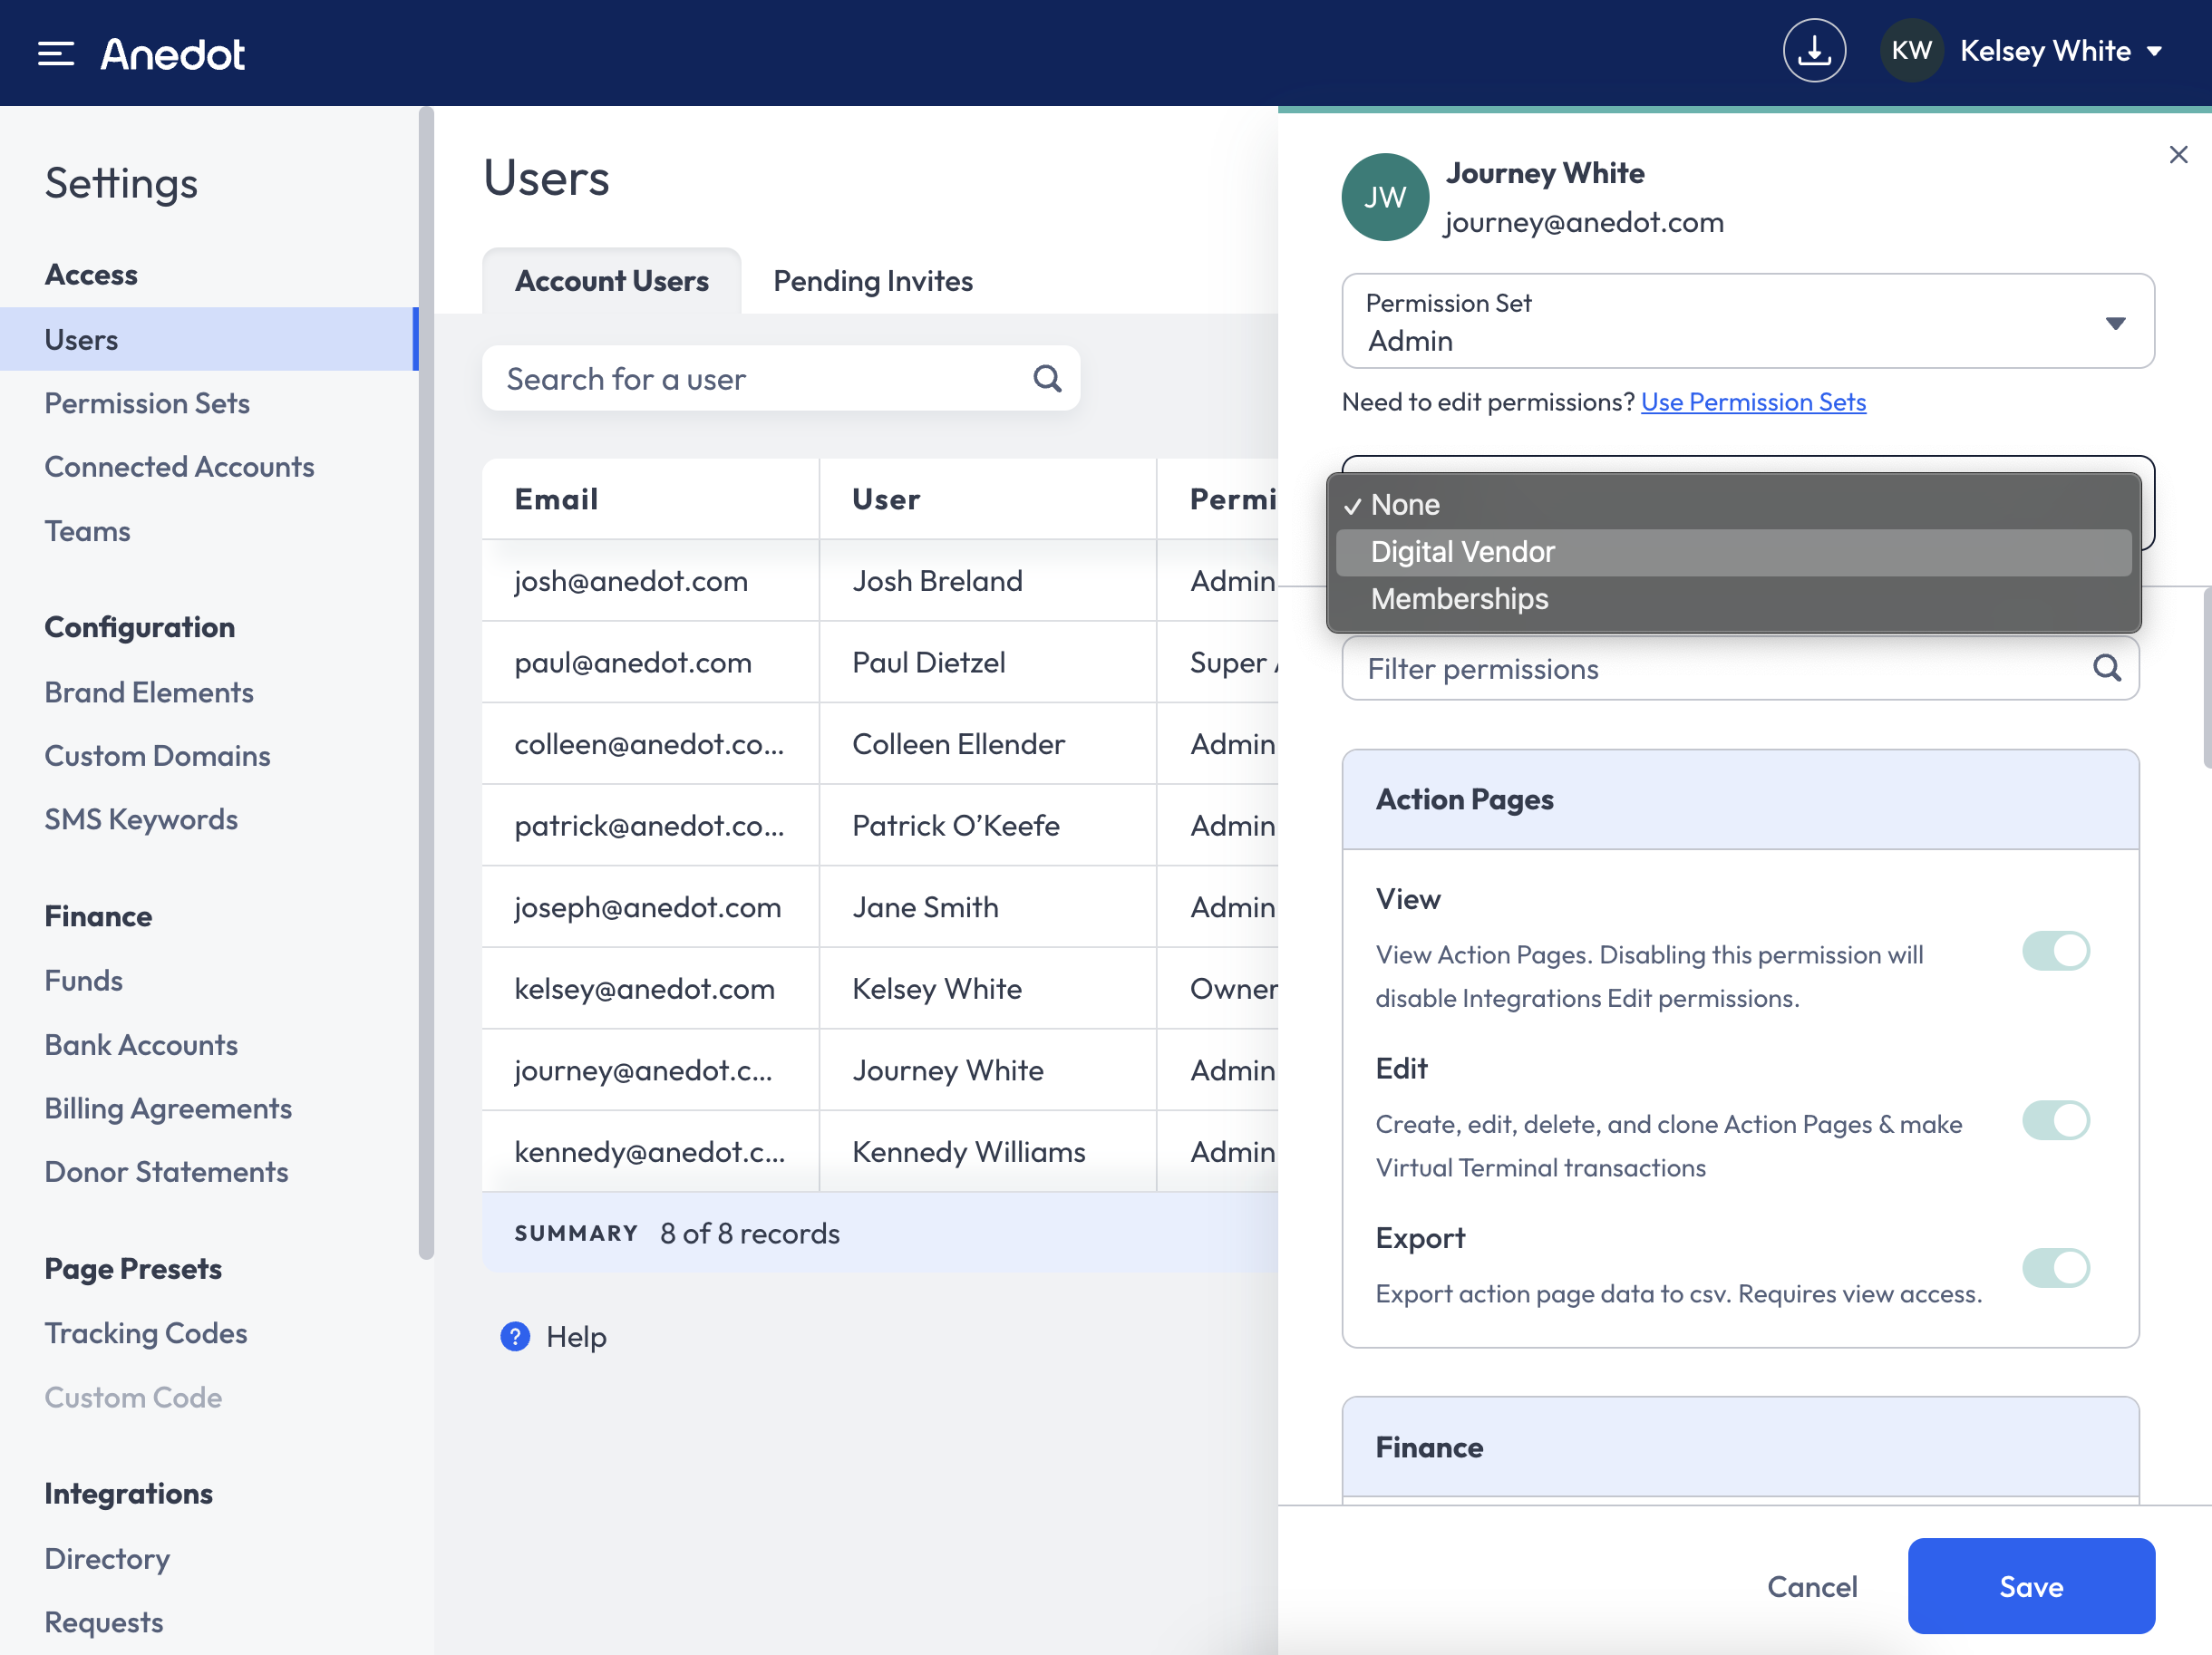
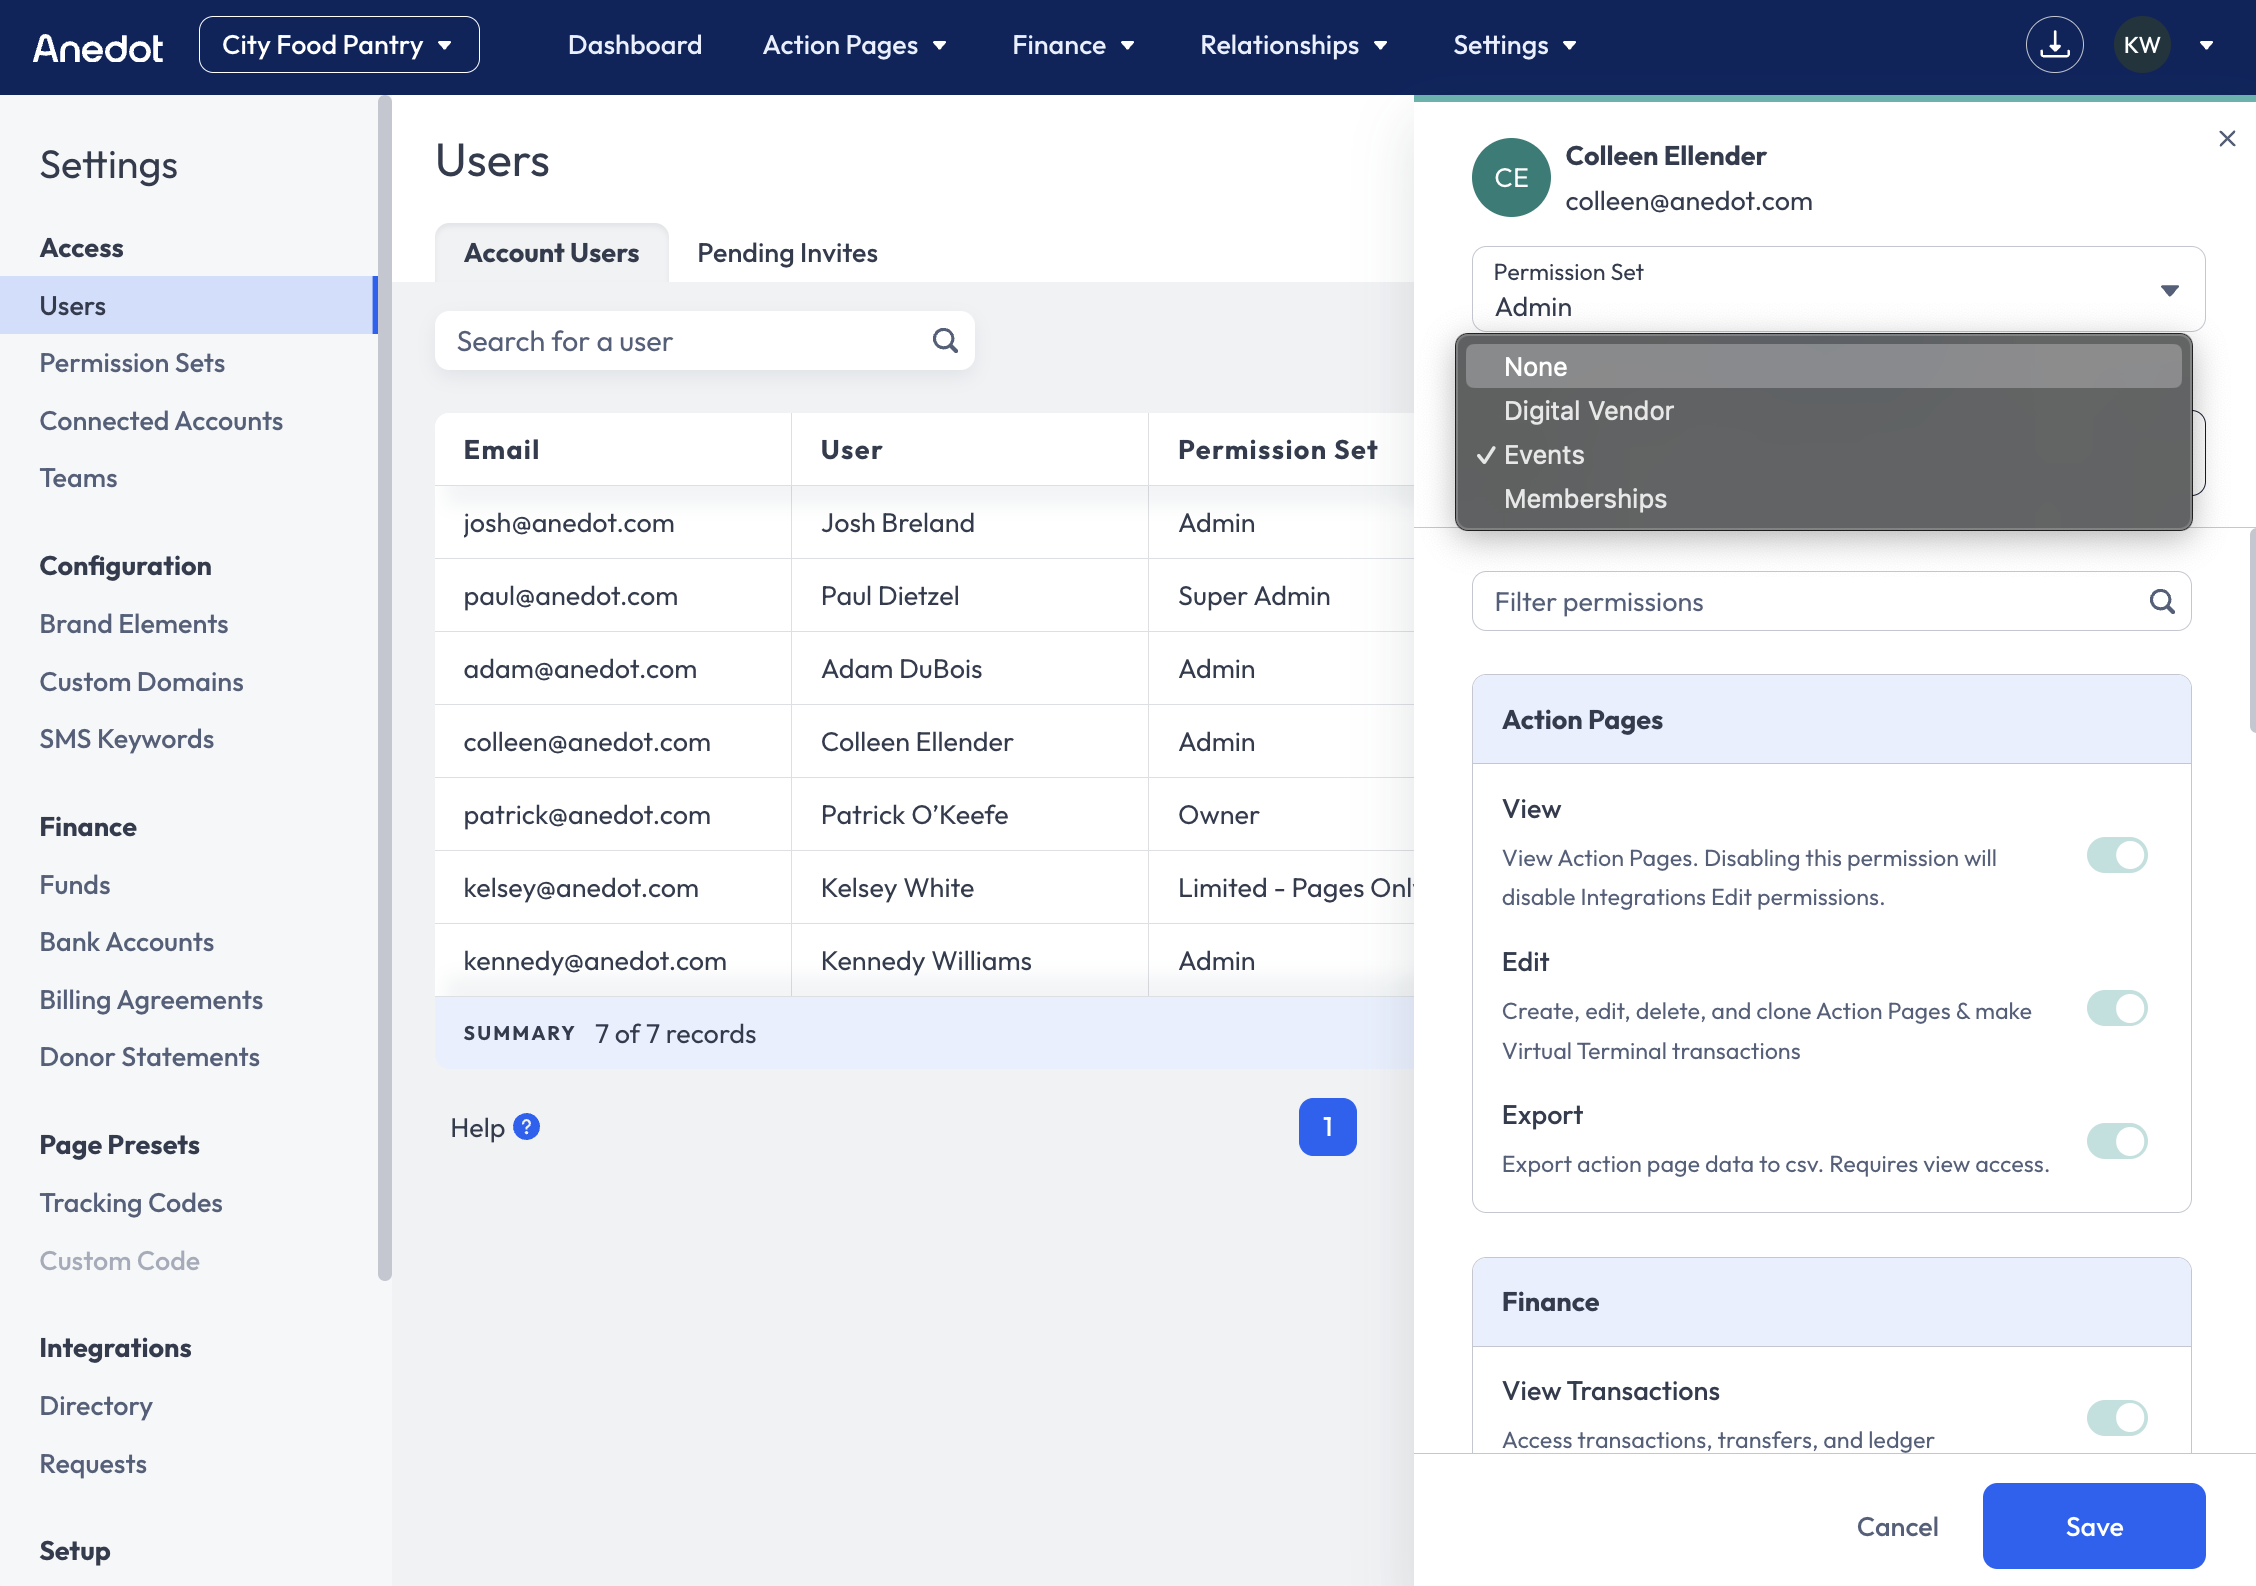
- Access the Settings>Access>Users tab within your fundraising account.
- Hover over the User's Email Address.
- Click Actions>Edit .
- Within the Access Editor, click the Team dropdown to assign the Team.
- Click the blue Save button.
Assign Team Tags to Action Pages
To Assign, Team, Tags to an Action Page, follow the steps below:
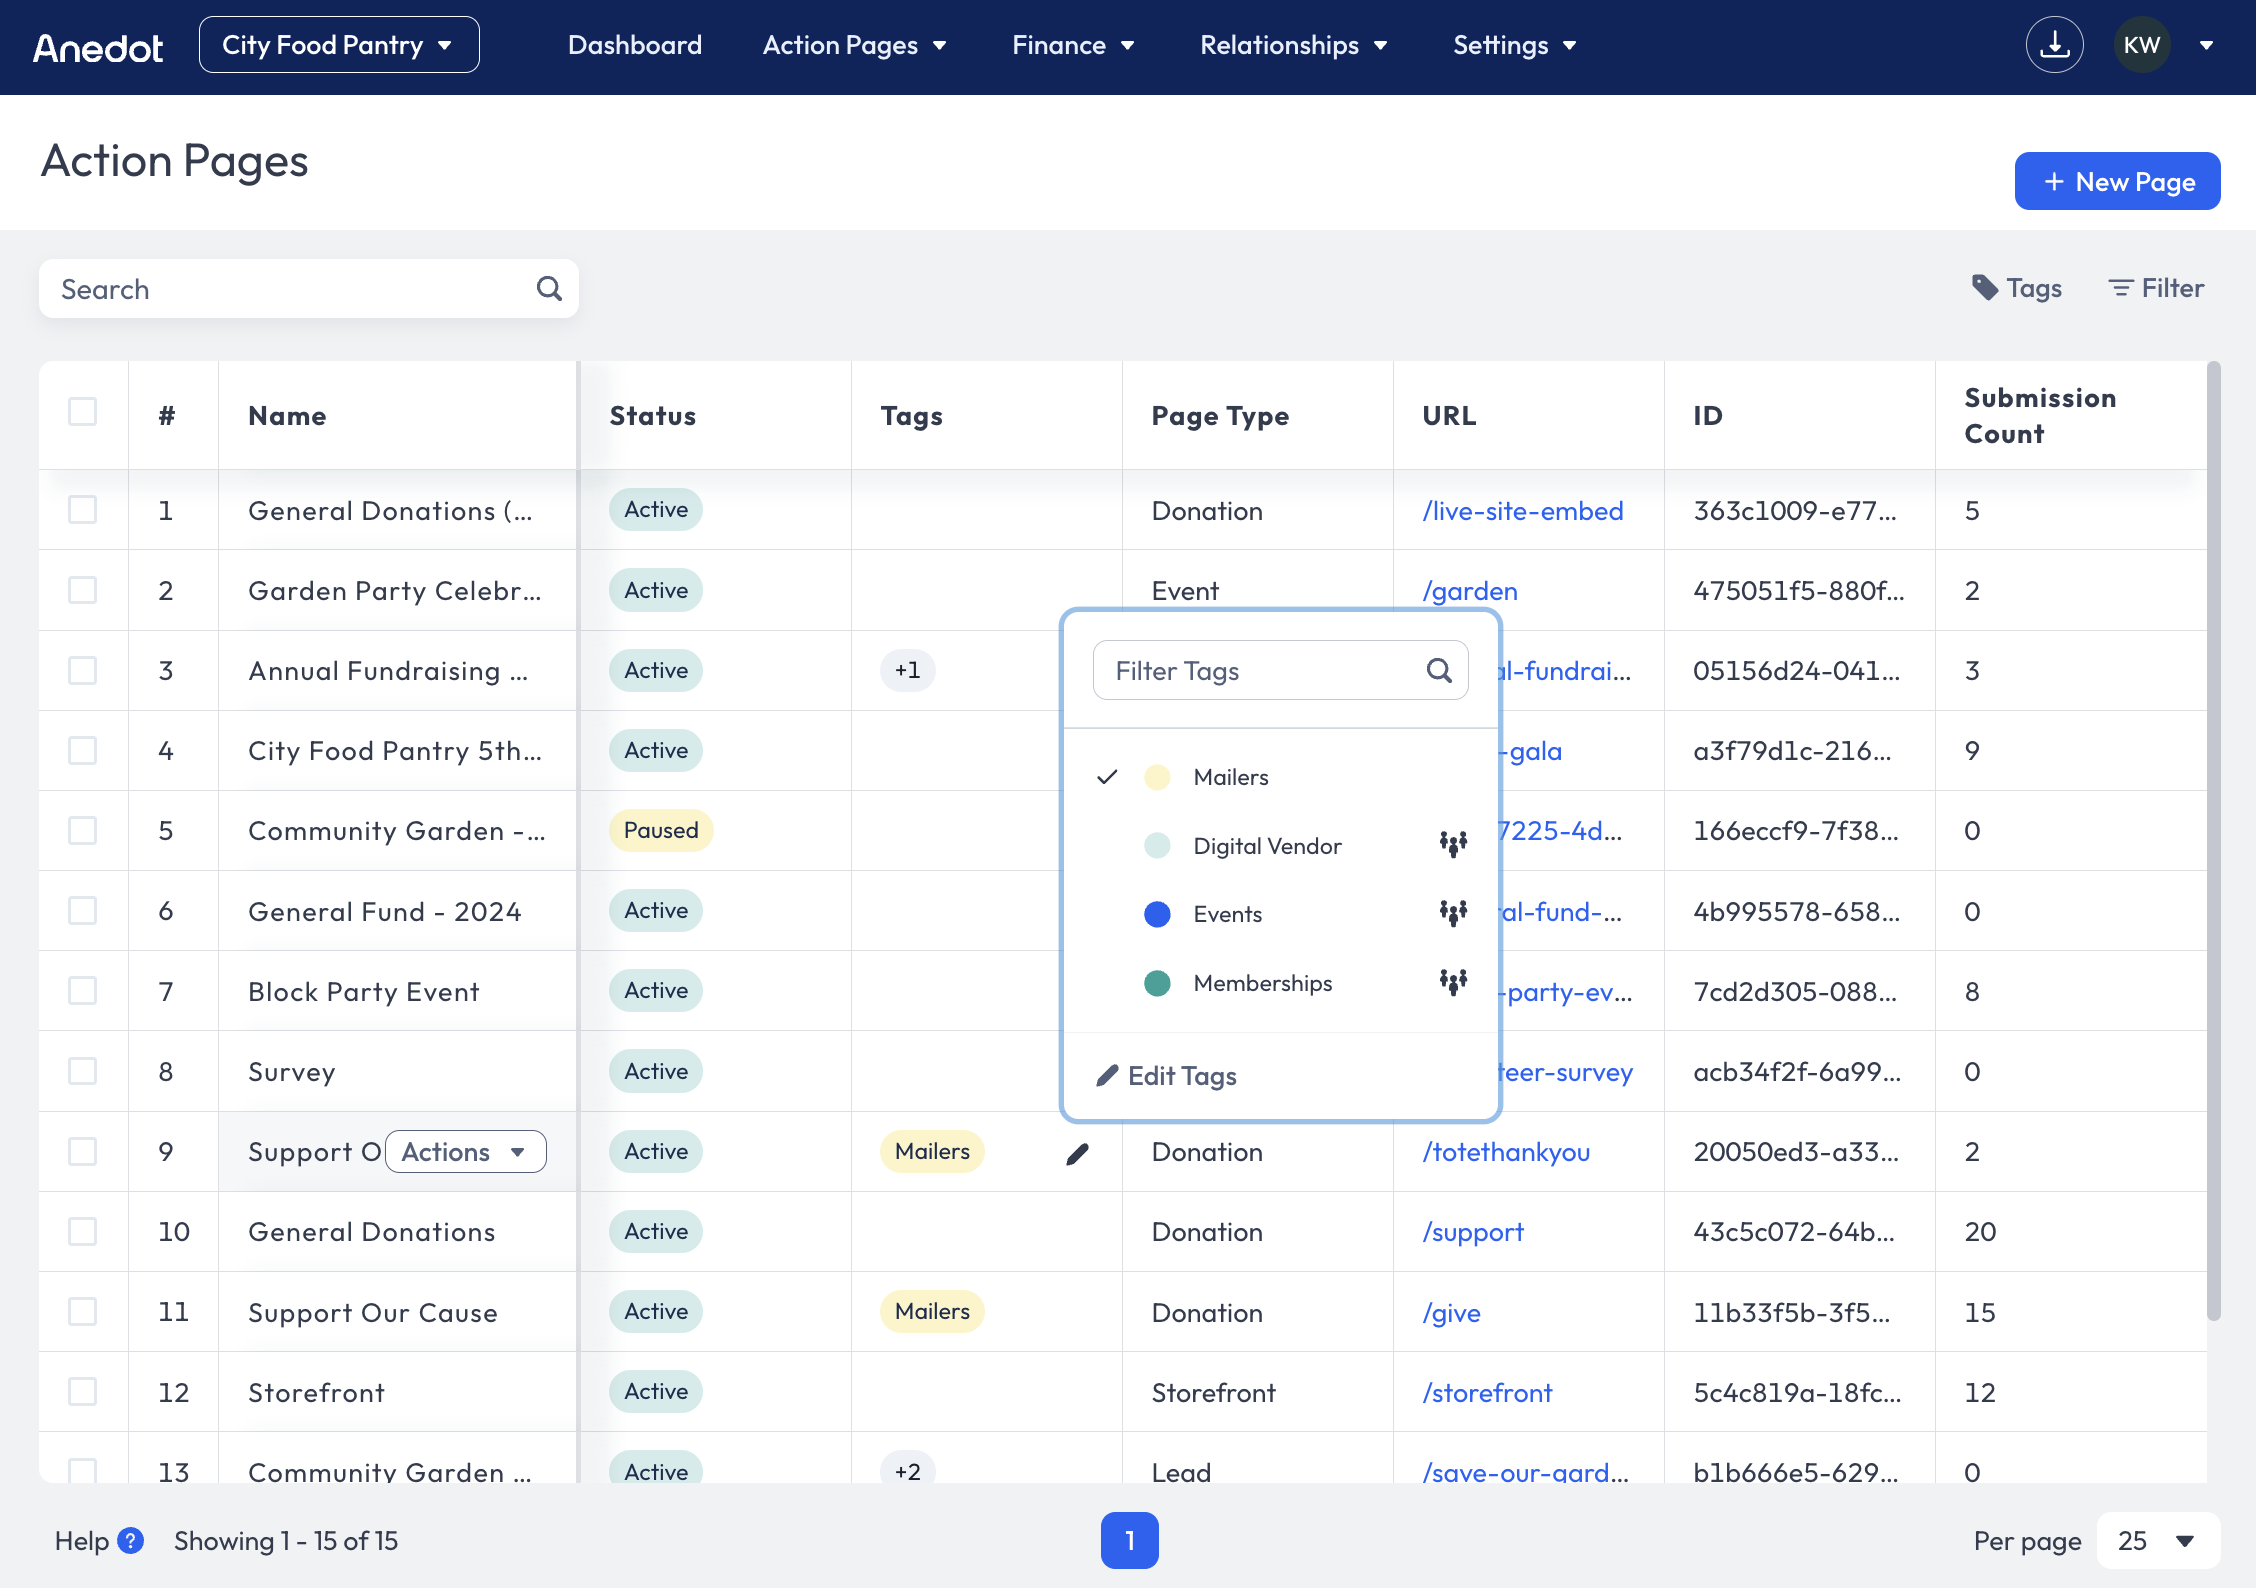
- Access the Action Pages>Pages tab within your fundraising account.
- Hover over the Tags column to the right of the Action Page.
- Click the Pencil icon.
- From the list of Tags, select the Team Tag you would like to assign to the Action Page.
- Click your cursor off of the list of Tags to Save the assignment.
Team Tags will show a People icon to the right of the Tag name.
If a Team Tag is not assigned to any Action Pages, users assigned to the Team will not have access to any account data.
- Access the Action Pages>Pages tab within your fundraising account.
- Hover over the Tags column to the right of the Action Page.
- Click the Pencil icon.
- From the list of Tags, select the Team Tag you would like to assign to the Action Page.
- Click your cursor off of the list of Tags to Save the assignment.
- Team Tags will show a People icon to the right of the Tag name.
If a Team Tag is not assigned to any Action Pages, users assigned to the Team will not have access to any account data.*
Create Additional Tags

Each Team created will be assigned a single Default Team Tag. If needed, you can apply additional Tags to each Team. The Tags created at the Team level can be applied to individual Action Pages to grant Team access.
Tags assigned to specific Teams should not be used for generic organization purposes, as assigning the tag will grant the Team access to those pages.
To Create Tags, follow the steps below:
- Access the Settings>Access>Teams tab within your fundraising account.
- Click the Tags icon in the upper right corner of the Teams table.
- Click + Create new tag.
- Name the Tag.
- Optionally, click the Note icon to add a Tag Description.
- Optionally, click on the Color to assign a specific color to the Tag.
- Click your cursor out of the Tag field to Save the Tag.
Once the Tag has been created, the Tag will be available in the list of Tags. Tags are displayed in alphabetical order.
Assign Tags to Teams
To Assign the a Tag to a Team, follow the steps below:
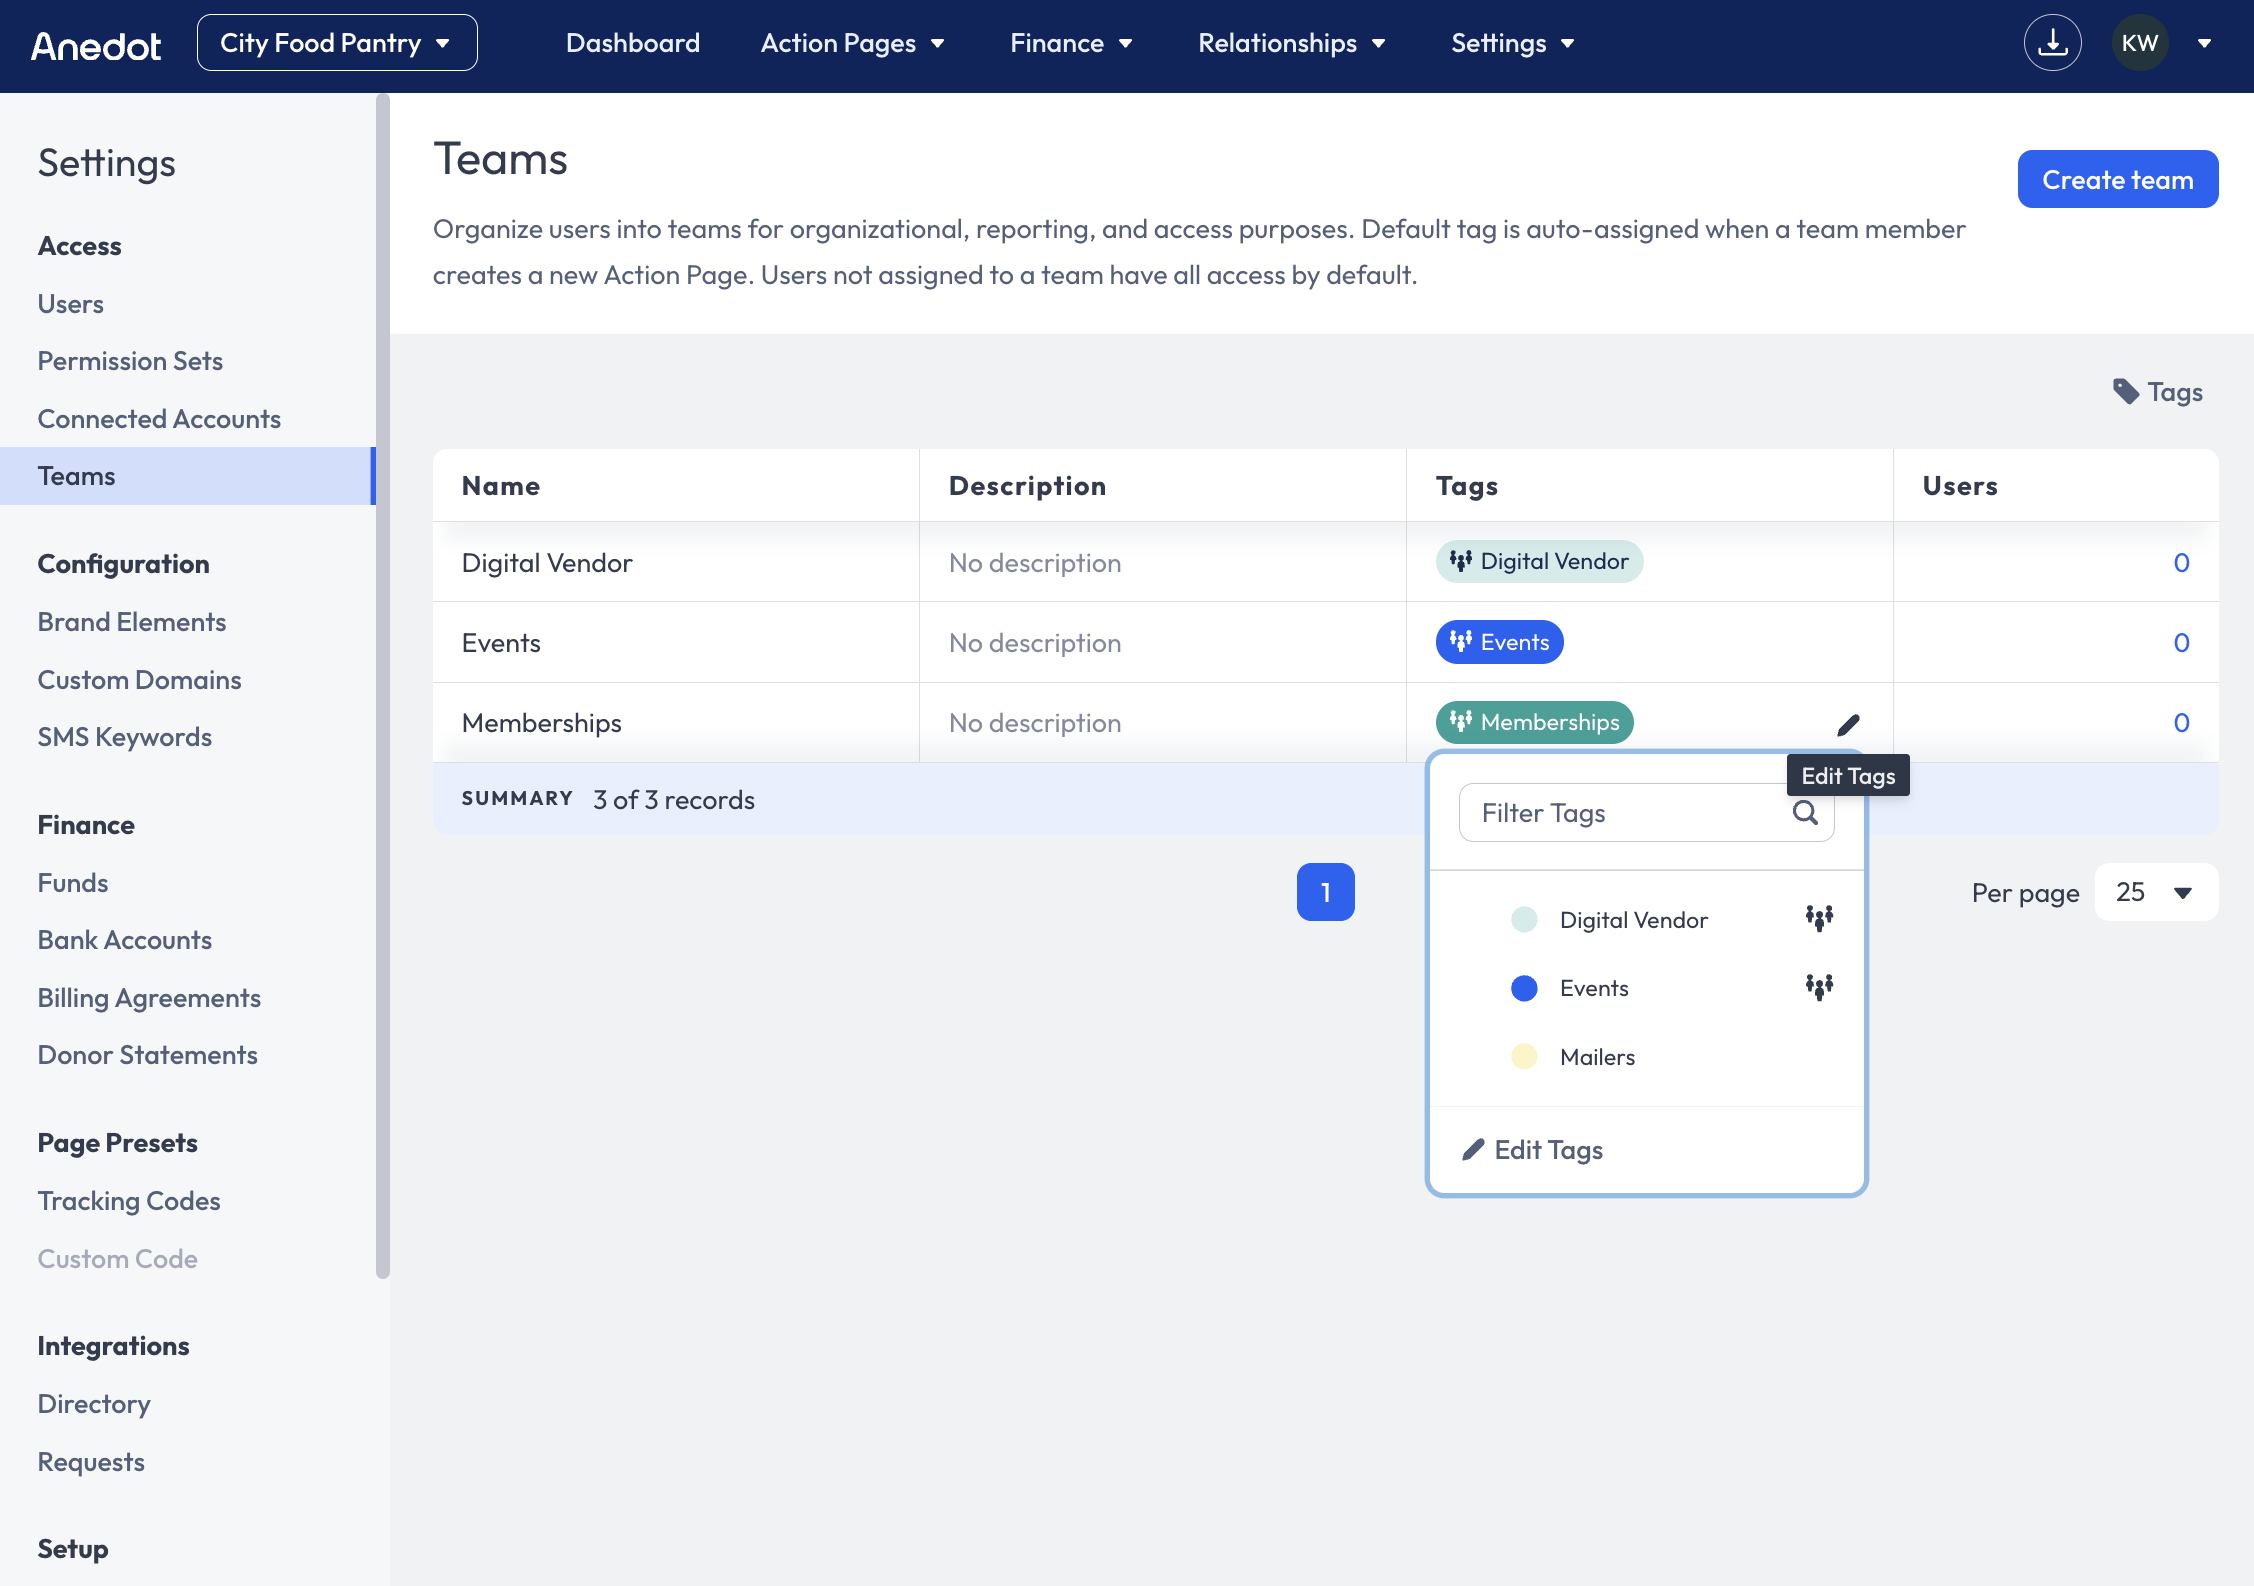
- Hover over the Tag column.
- Click the Pencil icon.
- Select the Tag.
- Click out of the list of Tags to Save your changes.
To Remove a Tag, follow the steps below:
- Hover over the Tag column.
- Click the Pencil icon.
- Click on the Tag once. The Tag will automatically be removed.
- Click out of the list of Tags to Save your changes.
Tags assigned to specific Teams should not be used for generic organization purposes, as assigning the tag will grant the Team access to those pages.
Delete Teams
If needed, Teams can be removed from the fundraising account. Before a Team can be deleted, all users must be removed from the Team.
Removing a user from a Team will allow that user to have full access to the account. If they should not have access to all account data, you will first want to create a new Team, or remove the user from the account.
To delete a Team, follow the steps below:
- Access the Settings>Access>Users tab within the fundraising account.
- Hover over the user's Email Address.
- Click Actions>Edit.
- Under Team within the Access Editor, select None or assign the user to a New Team.
- Click Save within the Access Editor.
Once all users have been removed from the Team, follow the steps below:
-
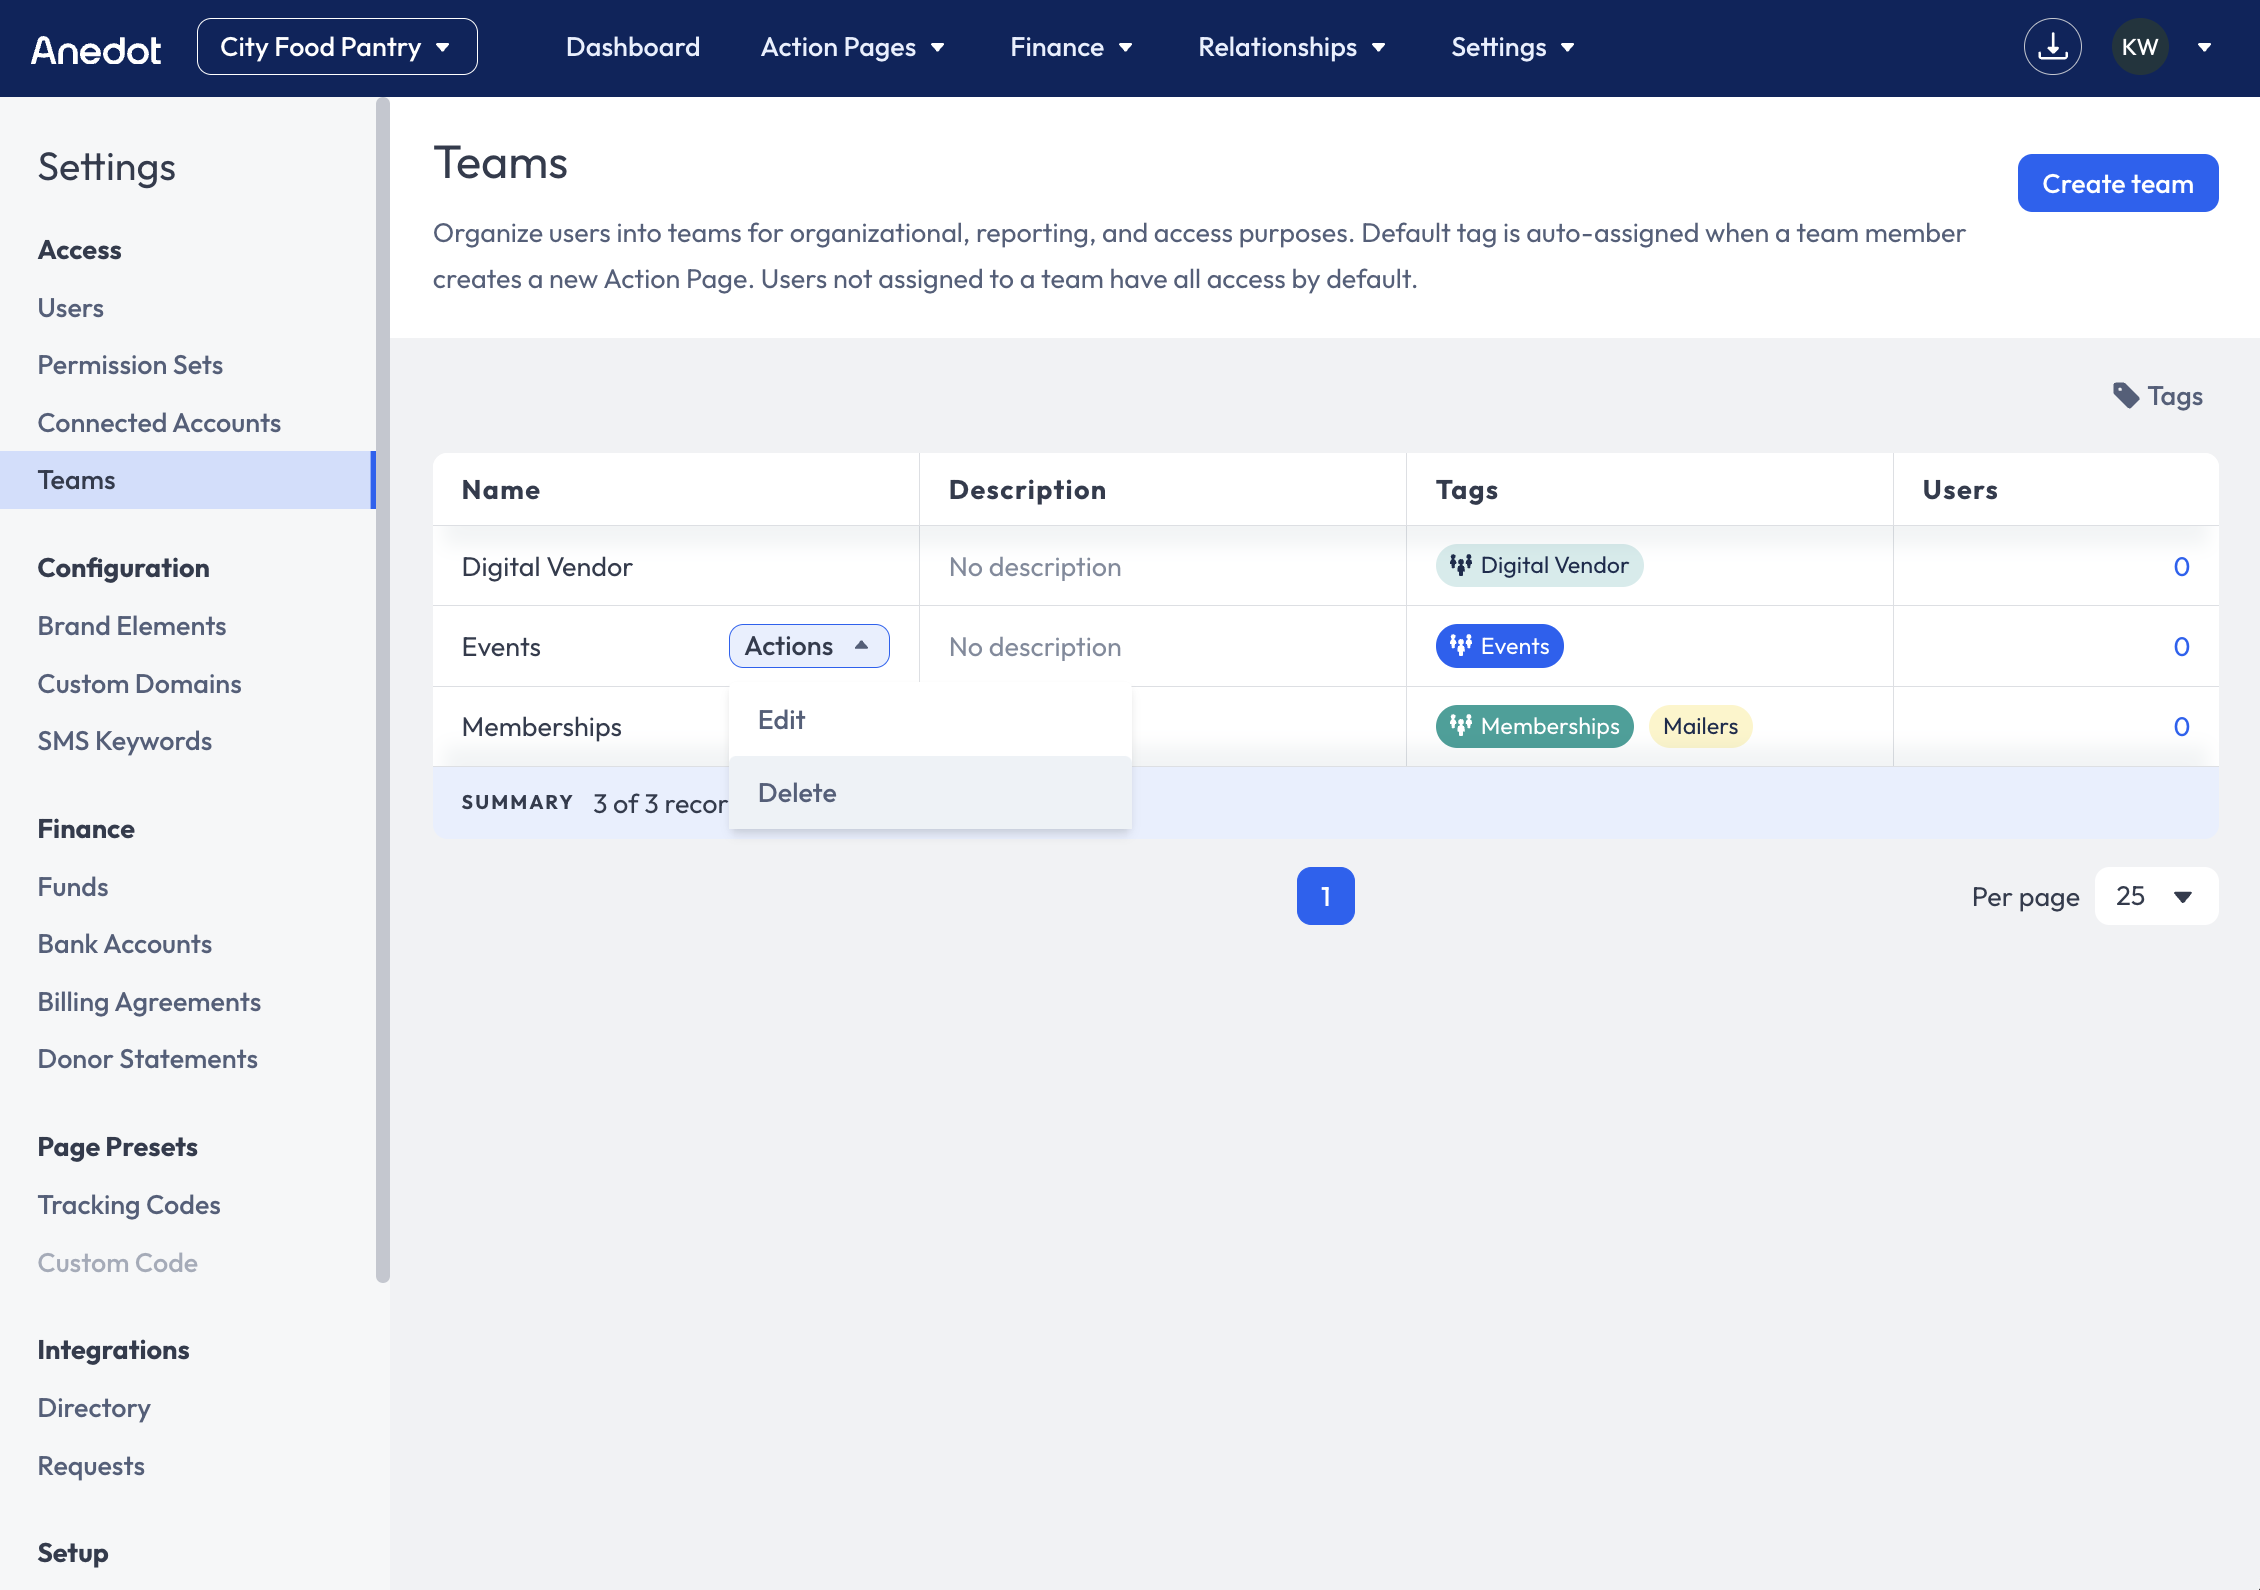
Access the Settings>Access>Teams tab within the fundraising account.
-
Hover over the Team.
-
Click Actions>Delete.
-
To confirm, click Delete team.
Deleting a Team will not delete the Team Tag. The Team Tag will become available for page tagging, but no access will be associated with the Tag.